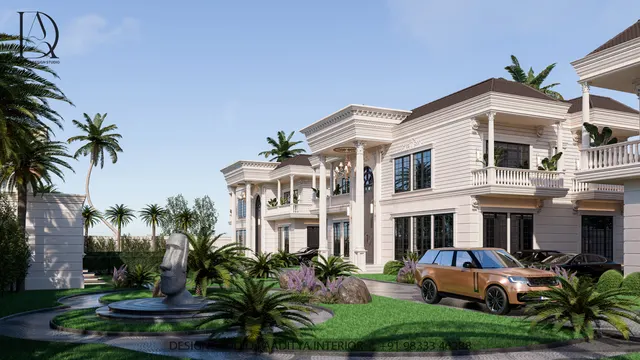
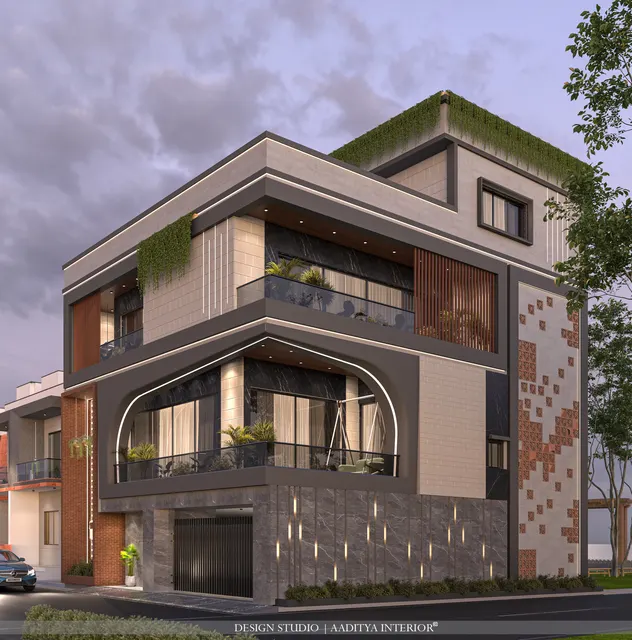
The compound wall is the first piece of a house that anyone sees and the last piece that most owners think about. It is usually built at the end of the project, when the budget is tired, by whichever mason is still on site, to a height copied from the neighbour. The gate is ordered from a fabricator's catalogue. And yet the wall and gate decide how the house meets the street: whether it looks welcoming or defensive, whether the car can turn in without scraping, whether rainwater drains away or floods the porch, and whether the wall is still standing straight in ten years.
Indian conditions make this harder than it looks. Plots are narrow, so the gate takes up a large share of the frontage. Roads are raised every few years, so a gate that cleared the ground on handover drags on the pavement later. Black cotton soil in large parts of Gujarat and Maharashtra swells in the monsoon and shrinks in summer, cracking walls that were built on shallow footings. Coastal air in Surat, Mumbai or Chennai rusts badly painted steel within two seasons. And local development control rules limit the height of road-facing walls, especially at corners, so the tall fortress wall many owners want is often not permitted at all.
This article treats the boundary as architecture rather than an afterthought. It covers where the Indian compound wall came from, the rules that govern its height, the structure that keeps it standing, the design options for the wall face, the types of gate and their dimensions, materials and indicative October 2026 costs, and the details — drainage, lighting, automation, security — that separate a good boundary from a merely expensive one.
From fort walls to front gardens: a short history of the Indian boundary
Walls around settlements are among the oldest structures in the subcontinent. Harappan cities had walled citadels; medieval towns such as Ahmedabad, Jaipur and Delhi were enclosed by fortification walls entered through monumental gates. Inside those cities, though, individual houses rarely had compound walls in the modern sense. In the pols of Ahmedabad, an entire street of houses shared a single gate at its mouth, closed at night, and each house opened directly onto the shared lane through an otla — a raised platform at the threshold. The haveli turned its blank, thick outer wall to the street and organised life around an inner courtyard; the boundary was the house itself.
The separate compound wall arrived with the colonial bungalow. Civil lines and cantonments laid out large plots with the house set back in a garden, and the boundary became a low wall or hedge with a pair of masonry piers and a cast-iron or timber gate. The wall was often no more than a metre high: its job was to mark the property, not to hide it. After Independence, plotted housing societies and development-authority layouts carried the idea into every Indian city, and as plots shrank and security concerns grew, walls rose and gates became solid sheets of steel.
Today the pendulum is swinging again. Many architects now prefer a boundary that is partly open — a solid base for privacy at seated height, with a screen, grille or jaali above that lets breeze and light through and keeps the street visible. Security research and police guidance in many countries point the same way: a wall so tall and solid that nobody can see over it also hides an intruder once inside. A boundary that is high enough to stop casual entry but open enough to be watched is usually the safer design.
| Era | Typical boundary | What it was for | Lesson for today |
|---|---|---|---|
| Walled cities (medieval) | City wall with monumental gates; no wall around each house | Defence of the whole town | Security can be shared — society gates, not just plot walls |
| Pol houses, Ahmedabad | One gate for a whole street; otla platform at each door | Community control of a lane | A raised threshold and a shaded seat soften the entry |
| Havelis (Rajasthan, Gujarat) | Thick blank outer wall, carved entrance door, inner court | Privacy and climate | Solid where privacy matters, open inside to light and air |
| Colonial bungalows | Low wall or hedge, masonry piers, cast-iron gate | Marking the garden and drive | Low, permeable boundaries make the house look generous |
| 1970s–2000s plotted housing | 1.5–2.1 m solid brick wall, MS sheet gate | Privacy and security on small plots | Tall solid walls hide intruders and block breeze |
| 2010s onward | Solid base with grille, jaali, louvres or planting above; automated gates | Balance of privacy, ventilation and surveillance | Design the wall face as part of the elevation |
How high should a compound wall be?
Height is the first decision and the one most often settled by habit. Three things should decide it: what the local rules allow, what privacy the ground floor actually needs, and what the wall does to light and breeze in the setback. Development control regulations in most Indian cities limit the height of compound walls on the road side, and many also limit the solid portion — allowing extra height only as an open grille or railing. Corner plots usually face a stricter limit within a visibility zone near the junction, so drivers can see around the corner. The exact figures differ between cities and between the general development control regulations of different states, so they must be checked in the local GDCR or with the architect before construction. As a planning guide, the bands below reflect common Indian practice.
| Situation | Typical height | Solid portion | Comment |
|---|---|---|---|
| Road-facing front wall, residential | 1.5–1.8 m overall | 0.9–1.2 m solid, grille above | Many local rules cap the front wall around 1.5 m — verify locally |
| Side and rear walls between plots | 1.8–2.1 m | Fully solid is common | Some rules allow up to about 2.4 m; neighbour agreement helps |
| Corner plot near junction | Often 0.75–1.0 m solid within the visibility splay | Open above if allowed | Keeps sight lines clear for traffic at the turn |
| Farmhouse or large plot boundary | 1.8–2.4 m | Precast panels, stone or mesh | Length dominates cost; mesh with hedge is cheapest |
| Bungalow with garden setback | 1.2–1.5 m | 0.6–0.9 m solid base | Lets the garden and elevation be seen; feels generous |
| Retaining condition (ground level differs) | Designed by engineer | Retaining portion is RCC or thick masonry | If soil is held back more than about 600 mm, it is a retaining wall |
The privacy logic is simple. A person standing on the road has eyes at about 1500–1650 mm; a person sitting in a front garden or porch has eyes at about 1100–1200 mm. A solid base of about 1200 mm therefore hides seated people from the road, while a fully solid wall of 1800 mm hides standing people too. Above about 1800 mm the gain in privacy is small but the loss of breeze and daylight in a narrow side setback is large — a 2.1 m wall in a 1.5 m setback turns that strip into a dark, damp corridor where moss grows on the plaster.
The structure: why compound walls crack and lean
Most compound wall failures are structural, not cosmetic. The usual culprits are a footing too shallow for the soil, no plinth beam to tie the wall together, piers too far apart, no movement joints in a long run, and no weep holes where the wall holds back soil or water. In black cotton soil the shallow footing is fatal: the clay swells when wet and shrinks when dry, lifting and dropping the wall a little every year until a diagonal crack opens at a pier. The section below shows a conventional, well-detailed 230 mm brick compound wall for normal soil. It is a typical arrangement, not a substitute for a structural engineer's design, which is essential on expansive soil, filled ground, slopes and any wall that retains earth.
Foundation and plinth beam
On firm natural soil a compound wall commonly sits on a footing 900–1200 mm below ground, either a stepped brick or stone masonry footing on a plain cement concrete bed, or isolated RCC footings under the piers connected by a plinth beam. The plinth beam — typically 230 mm wide and 230–300 mm deep, reinforced — is the single most valuable element in the wall. It spreads the load, ties the piers together and bridges small soft spots in the ground. Walls without a plinth beam are the ones that crack in a stepped diagonal line after the first heavy monsoon. On black cotton soil the advice changes: the footing must go below the zone of seasonal moisture change, or the wall should be carried on under-reamed piles of the kind described in IS 2911 (Part 3), with a gap or compressible layer under the plinth beam so the swelling clay cannot lift it.
Piers, movement joints and coping
A 230 mm brick wall of 1.5–1.8 m height needs stiffening piers, usually RCC columns of 230 × 230 mm or 230 × 300 mm, at about 3 m centres. A 115 mm half-brick wall is only suitable for low walls and needs piers much closer together; it should not be used for a full-height boundary. Long walls also need vertical movement joints — a clean 10–20 mm gap filled with a flexible sealant — roughly every 9–12 m and at changes in height or direction, so that thermal movement and minor settlement happen at a planned line instead of a random crack. The top of the wall needs a coping: a precast concrete, stone or tile cap 50–75 mm thick that projects 25–40 mm on both sides with a drip groove underneath. Without it, rain soaks into the top course and runs down the face, leaving the black streaks that make Indian boundary walls look old within two monsoons.
Drainage and weep holes
A compound wall often has garden soil on one side and a road or a neighbour's paving on the other. Water collects against the wall, and if it cannot pass, it either soaks the masonry or builds pressure behind it. Weep holes of 75–100 mm diameter at 1.5–2 m centres just above finished ground level let water through; where the ground on one side is higher, they become essential, and a gravel backfill behind them stops soil washing out. The gate opening deserves particular care: if the road is higher than the driveway, as it often becomes after resurfacing, a trench drain with a steel grating across the gate stops street water from running into the porch.
Six ways to design the wall face
Once the structure is right, the face of the wall becomes part of the elevation. The wall should belong to the same family as the house — the same plaster colour, the same stone or brick, the same line of a parapet or band — rather than being a separate object. The sketch below compares six common approaches at the same height so their privacy and openness can be judged side by side.
A plain plastered wall (A) is the cheapest and quietest option; its success depends on a good coping, a crisp plaster finish and a colour that matches the house. The half-grille wall (B) is the most common modern compromise: a 900–1200 mm solid base with a mild steel grille, flat bars or aluminium louvres above. The jaali wall (C) replaces the grille with a screen of GFRC, laser-cut steel or terracotta blocks, giving a filtered view and dappled light — the same idea explored in the jaali article on this site. Exposed brick (D), in good wire-cut bricks with neat raked joints, never needs repainting and ages well, but demands careful masonry because there is no plaster to hide mistakes. Stone cladding (E) is usually applied only to the road face and the gate pillars, where it carries the elevation material out to the street. A green wall (F) uses a low solid base with a trellis or planter above; it is beautiful and cool but needs drip irrigation and regular pruning, and it is the one option that depends on maintenance for its whole appearance.
Matching the wall to the house
Three small decisions make the wall look designed. First, continue a line: if the house has a plinth band or a first-floor slab edge, align the top of the solid base or the coping with a visible line on the elevation where possible. Second, keep the material palette to two: one dominant (plaster, brick or stone) and one accent (the grille, gate or jaali). Third, design the gate pillars as part of the wall rather than as separate monuments — oversized pillars with domes and lamps on top date a house faster than any other element. A pillar slightly wider than the wall, finished in the accent material, with an integrated nameplate, letterbox and video door phone, is quieter and more useful.
Gate types: swing, sliding, cantilever, folding
The gate is the only moving part of the boundary, and the choice of type should come from the plot, not from a catalogue picture. The key questions are how wide the opening must be, how much space there is behind the gate, whether the driveway slopes, and whether the gate will be automated. The table compares the main types used on Indian homes.
| Gate type | Space it needs | Best for | Watch out for | Automation |
|---|---|---|---|---|
| Double-leaf swing | Clear arc inside the plot equal to each leaf width | Most bungalows with a level drive and a setback of 4 m or more | Leaves sag if pillars or hinges are undersized; arc must clear any upward slope | Arm or underground motors, one per leaf |
| Single-leaf swing | Arc equal to full gate width | Pedestrian gates; narrow car gates up to about 3 m | A wide single leaf is heavy and sags; needs a strong pillar | One arm motor |
| Sliding on track | Straight, level wall run of gate width plus 300–500 mm | Narrow front setbacks, sloping drives, wide openings | Track fills with mud and stones; needs a drain and regular cleaning | Rack-and-pinion motor, simple and reliable |
| Cantilever sliding | Wall run of gate width plus about 40–50 % tail | Uneven or unpaved ground where a track would clog | Needs a longer wall behind and heavier steel section | Same as sliding |
| Telescopic sliding (two leaves) | Wall run of about half the opening plus overlap | Very wide openings on short walls | More rollers and guides to maintain | Possible with special kits |
| Bi-fold / folding | Small arc inside the plot | Tight drives where a full swing will not fit | More hinges, more wear; heavier hardware | Specialist motors |
In practice, sliding gates are often the better choice on Indian city plots. Front setbacks are short, so a swinging leaf hits the parked car; roads and drives slope, so a swing gate scrapes; and a sliding gate is simpler to automate. Swing gates remain the more graceful option on generous plots with a level drive, and a double-leaf swing gate with a separate pedestrian wicket is still the most common arrangement on Indian bungalows. Whichever type is chosen, the gate must open inwards or slide along the plot side: most local rules do not allow gates to swing out over the public road, and it is unsafe to do so.
Gate and pillar dimensions
Gate sizes are decided by the car, the road and the turning movement. A typical Indian hatchback is about 1.7 m wide and a large SUV about 1.9–2.0 m, without mirrors. A 3.0 m clear opening is the practical minimum for one car on a wide road; 3.6–4.2 m is comfortable, especially where the car has to turn in from a narrow lane. Two cars side by side need 5.0–6.0 m. Height is mostly about proportion and privacy: 1.5–1.8 m is the common range, matching the wall. The table gathers the typical figures used in Indian residential practice.
| Element | Typical dimension | Why |
|---|---|---|
| Car gate clear width, one car | 3000 minimum, 3600–4200 comfortable | Car width plus mirrors, turning from the road and walking space beside |
| Car gate clear width, two cars | 5000–6000 | Two cars side by side, or a car and a two-wheeler |
| Pedestrian wicket | 900–1200 wide | One person with bags, a pram or a wheelchair; 1000 is a good default |
| Gate height | 1500–1800, occasionally 2100 | Matches the wall; taller gates catch more wind and need stronger hinges |
| Gate pillar | 450 × 450 for leaves up to about 2 m; 600 × 600 for heavier gates | Resists the leverage of a swinging leaf; RCC core with hinge plates cast in |
| Ground clearance under a swing gate | 50–75 above the highest point of the swing arc | Prevents scraping when the drive or road level rises |
| Sliding gate parking length | Gate width plus 300–500 overlap | The leaf must clear the opening fully and engage the guide |
| Cantilever gate total length | About 1.4–1.5 × clear opening | The tail balances the unsupported span |
| Trench drain at gate | 100–150 wide grating across full opening | Stops road water entering the plot after road resurfacing |
Pillars deserve special attention. A swinging leaf of 1.8 × 1.8 m in steel can weigh 80–150 kg depending on its infill, and its centre of gravity sits almost a metre from the hinge, so the pillar is constantly pulled forward and down. A hollow brick pillar with hinges grouted into the joints will move within a year. The pillar should have a reinforced concrete core connected to the footing and plinth beam, with steel hinge plates or anchor bolts cast in or fixed with chemical anchors. Heavy gates are better hung on a bottom pivot bearing with a top hinge, which carries the weight on the ground rather than on the pillar.
Materials and indicative costs
Costs for boundary work are usually quoted per running metre (or running foot) for walls and per square foot of gate area for gates. The ranges below are indicative October 2026 figures for Gujarat and comparable tier-1 and tier-2 cities, including material, labour and a normal foundation on firm soil. Expansive soil, deep filling, retaining conditions, special finishes and long carting distances push costs up, sometimes sharply. They should be confirmed with local contractors against a drawing before budgeting.
| Wall type (about 1.5–1.8 m high) | Indicative cost per running metre | Life and upkeep | Best for |
|---|---|---|---|
| 230 mm brick, plastered both sides, painted, with footing, plinth beam and piers | ₹7,000–12,000 | Long-lasting; repaint every 4–6 years | Most urban plots, side and rear walls |
| 200 mm AAC or concrete block, plastered, same structure | ₹6,000–10,000 | Good; needs careful plaster at joints | Faster construction where blocks are local |
| Exposed wire-cut brick, raked joints, sealer | ₹8,000–13,000 | Very good; re-seal every few years | Road fronts matching brick elevations |
| Half-solid base with MS grille above | ₹8,000–14,000 | Grille repainting every 3–4 years (coastal: more often) | Road-facing fronts within height limits |
| Precast RCC panel wall | ₹2,000–4,000 | Good; joints can loosen if posts are poorly founded | Farmhouses, industrial and large plots |
| Random rubble or dressed stone masonry | ₹8,000–14,000 | Very long life, almost no upkeep | Farmhouses and sites where stone is local |
| Chain-link or welded mesh on posts, with hedge | ₹800–2,000 | Mesh lasts 8–15 years if galvanised | Large plots, rear boundaries, budgets |
Finishes and add-ons sit on top of the base wall. Exterior weather-shield emulsion costs about ₹17–26 per sq ft of painted area all-in, the same rate used for facades elsewhere on this site. Natural stone cladding on the road face typically adds about ₹180–450 per sq ft installed, depending on the stone and the fixing method; heavy stone on a tall wall should be mechanically anchored, not only stuck with adhesive. Jaali infills follow the jaali material table: laser-cut mild steel about ₹450–1,000 per sq ft, GFRC about ₹700–1,600 per sq ft, and terracotta jaali blocks about ₹60–250 per block for material.
| Gate material | Indicative cost per sq ft of gate | Weight and feel | Corrosion and upkeep |
|---|---|---|---|
| MS box and pipe sections, primer and enamel or PU paint | ₹450–900 | Heavy, solid | Repaint every 2–4 years; galvanise near the coast |
| MS frame with laser-cut sheet infill, powder coated | ₹600–1,200 | Heavy; modern pattern | Powder coat lasts longer if the steel is blasted or zinc-primed first |
| Stainless steel 304, brushed or PVD | ₹1,200–2,500 | Medium; contemporary | Minimal; use 316 on the sea front |
| Aluminium profiles, powder coated | ₹900–1,800 | Light; easy to automate | Excellent; does not rust |
| MS frame clad in WPC or treated timber slats | ₹900–2,000 | Warm, residential look | Timber needs oiling; WPC can fade in strong sun |
| Automation kit (motor, controls, safety sensors) | Swing pair ₹40,000–1,20,000; sliding ₹30,000–90,000 per gate | — | Annual service; battery backup for power cuts |
A worked example helps. A 12 × 18 m bungalow plot has about 12 m of front wall (less the gate opening), two side walls of 18 m and a rear wall of 12 m — roughly 56 m of wall in all. Built as a plastered 230 mm brick wall at ₹7,000–12,000 per running metre, the walls alone cost about ₹3.9–6.7 lakh. A 3.6 × 1.8 m MS gate with laser-cut infill (about 70 sq ft) at ₹600–1,200 per sq ft adds ₹42,000–84,000, a matching wicket another ₹12,000–25,000, and a sliding gate motor ₹30,000–90,000. With stone cladding on the road face, gate lighting and a trench drain, a mid-range boundary for this plot lands in the region of ₹5–8 lakh, which is consistent with the boundary allowance used in the bungalow cost guides on this site.
Gate details that decide whether it works for twenty years
Most gate complaints — sagging, scraping, rattling, rust streaks, motors that fail — come from a handful of details that are invisible in a catalogue photograph. The sketch below shows the critical points for a swing gate and a sliding gate.
For swing gates, the frame must be stiff: a rectangular frame of adequate box section with a diagonal brace or a fully welded infill, so the leaf cannot rack into a parallelogram. Hinges should be bearing-type, sized for the leaf weight, and fixed to a concrete core with bolts, not grouted into brickwork. For sliding gates, the inverted-angle track must be embedded in a concrete strip, laid dead level and kept clear; a drain beside or under the track stops it filling with water and silt in the monsoon. Top guide rollers keep the leaf vertical in wind. In all cases the steel should be cleaned and zinc-primed or galvanised before painting or powder coating; near the sea, hot-dip galvanising under the powder coat is worth its cost.
Automation and safety
Gate automation has become common on Indian bungalows, and it is safe only when installed properly. Every automated gate should have obstacle-detection photocells across the opening, a force or current limit on the motor so that it stops and reverses on contact, a manual release for power cuts, a flashing lamp, and battery backup where outages are frequent. A sliding gate must never leave a trapping gap where a child's hand or foot can be drawn in between the leaf and the pillar or the rollers. Manufacturers' installation instructions should be followed exactly, and the installer should demonstrate the safety reversal at handover.
Lighting, letterbox, nameplate and security at the boundary
The gate pillar is the house's reception desk. Plan the nameplate, house number, letterbox or parcel box, video door phone, gate lights and any CCTV camera together, with conduits laid in the pillar during construction rather than chased in later. Path and gate lighting of about 5–10 lux on the approach is enough for safety without glare, using IP65-rated fittings with shields so the light falls on the ground rather than into the eyes of people on the road. Gate lights on pillars are best kept modest in size and mounted around 1800–2100 mm, or recessed into the pillar face.
For security, a 1.5–1.8 m wall with an open upper portion that neighbours and passers-by can see through is usually more effective than a blind 2.4 m wall. Avoid footholds on the outside — horizontal grille bars at regular spacing and planters against the outer face make an easy ladder; vertical bars and smooth plaster do not. Broken glass on coping and sharp spikes at low height can injure people and may conflict with local rules; anti-climb measures should be discreet and placed above reach. Good lighting, a clear view from the house to the gate and a reliable gate lock achieve more than sheer height.
Where boundary design is heading
Three shifts are visible in new Indian projects. The first is permeability: walls are getting lower and more open, using jaalis, louvres, perforated metal and planting to let breeze into setbacks that would otherwise be dead, hot strips. The second is integration: the boundary is being designed with the elevation — the same stone, brick or concrete, the same lines — and with services, so the pillar holds the meter boxes, the intercom and the parcel box behind neat doors instead of scattering them across the wall. The third is technology: app-controlled and solar-assisted gate motors, number-plate recognition in gated communities, and parcel lockers at the boundary are spreading from commercial projects to homes. None of this changes the fundamentals. A boundary that is founded properly, drained, capped and painted, with a gate that is hung or tracked correctly, will outlast every trend in its infill.
Ten rules for a compound wall and gate that last
- Check the local GDCR for road-facing height, solid-portion limits and corner-plot visibility rules before drawing the wall.
- Use a 230 mm wall (or 200 mm block) with RCC piers at about 3 m centres for full-height boundaries; never a 115 mm wall at 1.5 m or more.
- Always build a reinforced plinth beam; on black cotton soil, have an engineer design the foundation.
- Provide movement joints every 9–12 m and at changes in height or direction.
- Cap the wall with a coping that overhangs 25–40 mm with a drip groove on both sides.
- Put weep holes at 1.5–2 m centres wherever soil or water sits against one side.
- Size the car gate at 3.6–4.2 m clear for one car, and give it pillars with an RCC core of at least 450 × 450 mm.
- Hang swing gates 50–75 mm above the highest point of the arc; choose a sliding gate if the drive slopes or the setback is short.
- Galvanise or zinc-prime all steel before painting, especially within reach of sea air.
- Lay conduits for lights, video door phone, camera and gate motor in the pillars and under the drive before paving.
Frequently asked questions
What is the standard height of a compound wall in India?
There is no single national figure. Most residential compound walls are 1.5–1.8 m high. Many local development control rules restrict road-facing walls to around 1.5 m, sometimes with only part of that solid, and impose lower limits near road junctions on corner plots. Side and rear walls between plots are commonly 1.8–2.1 m. Always check the current local regulations.
How much does a compound wall cost per running foot?
A plastered and painted 230 mm brick wall about 1.5–1.8 m high, with footing, plinth beam and piers on firm soil, costs about ₹7,000–12,000 per running metre, or roughly ₹2,100–3,700 per running foot, as an indicative October 2026 range. Precast panel walls are cheaper, about ₹2,000–4,000 per running metre, and stone cladding or jaali infills add to the base cost.
Which is better, a sliding gate or a swing gate?
A sliding gate suits short setbacks, sloping drives and automation, because it needs no swing arc inside the plot. A swing gate suits generous, level drives and looks more traditional, but needs strong pillars and enough clear space for each leaf. On most compact Indian city plots, a sliding gate is the more practical choice.
Why does my compound wall have cracks?
The common causes are a shallow footing on expansive soil, no plinth beam, piers too far apart, no movement joints in a long wall, and trees or water too close to the foundation. Fine vertical cracks at regular intervals are usually shrinkage or thermal movement; stepped diagonal cracks or a leaning wall point to foundation movement and should be inspected by a structural engineer.
How wide should a main gate be for a car?
Allow at least 3.0 m clear for one car, and 3.6–4.2 m for comfortable entry, especially from a narrow road where the car must turn in. For two cars side by side, allow 5.0–6.0 m. Add a separate pedestrian gate of about 1.0 m so the main gate need not be opened for people on foot.
Sources & standards
- Bureau of Indian Standards — National Building Code of India 2016, Part 3 (Development Control Rules and General Building Requirements) and Part 6 (Structural Design)
- Bureau of Indian Standards — IS 1905 (structural use of unreinforced masonry) and IS 2911 (Part 3) (under-reamed pile foundations)
- Bureau of Indian Standards — IS 456 (plain and reinforced concrete) and IS 2062 (structural steel)
- Local development control regulations — e.g. Gujarat Comprehensive General Development Control Regulations (CGDCR) for compound wall height and corner-plot limits
- Neufert, Architects' Data — vehicle dimensions and access widths
- Gate automation manufacturers' installation and safety guidance (obstacle detection, force limitation, manual release) — described generically
- Price ranges: indicative October 2026 estimates — confirm locally before budgeting