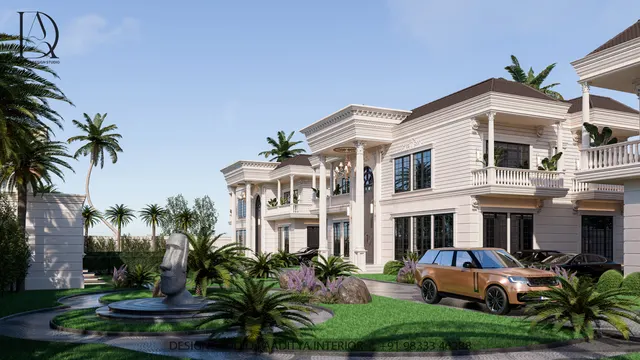
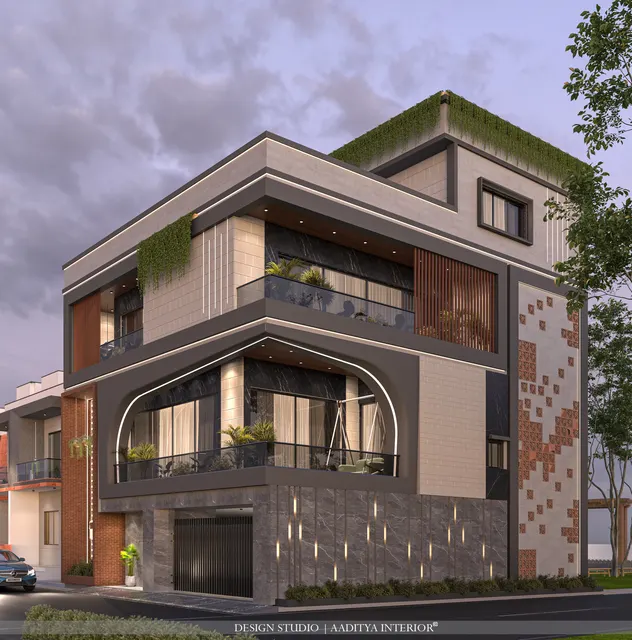
Building a house is, for most Indian families, a once-in-a-lifetime project. It ties up savings for years, involves dozens of trades and several government offices, and produces something that will be lived in for decades. Yet many houses are still planned in the most fragile way possible: a contractor sketches a layout on the back of a quotation, the family adds rooms as ideas arrive, and the structure, plumbing and electrical routes are decided on site as the walls go up. The result is familiar — toilets above the kitchen, staircases that steal light from the living room, west-facing bedrooms that never cool down, and a budget that runs out before the finishes.
Good planning reverses the order. It begins with what the family needs and what the plot allows, tests the layout against the sun, the wind, the bye-laws and the structure, and only then draws the elevation and chooses materials. Every decision made on paper costs almost nothing to change; the same decision made on site after the slab is cast costs money, time and, often, compromise for the life of the building.
This guide sets out the twelve steps Aaditya Interior follows when planning a house, using a typical plot of about 10 × 18 m (roughly 33 × 59 ft) to make each step concrete. The figures are illustrative: setbacks, FSI and other limits vary by city, zone and road width, so every number that depends on a bye-law must be checked against the regulations that apply to the actual plot — in most Gujarat cities, the Comprehensive General Development Control Regulations (CGDCR).
How Indians planned houses before bye-laws
Traditional Indian houses were planned by climate and custom long before they were planned by regulation. The pol houses of old Ahmedabad were narrow, deep row houses arranged around small open-to-sky courtyards that drew hot air up and out and brought daylight into the middle of the plan. Raised front platforms (otlas) and shaded verandahs made a buffer between the street and the home. In Kerala, sloping roofs with deep overhangs shed monsoon rain; in Rajasthan, thick walls and small openings resisted desert heat. Vastu Shastra, the traditional body of building principles, gave rules for orientation and the placement of rooms that many families still follow today, and many of its recommendations align with practical climate sense — kitchens placed to catch morning light, heavy masses on the hot sides of the house.
The modern Indian house changed with reinforced concrete, municipal bye-laws and land prices. The RCC frame freed plans from load-bearing walls and allowed flat roofs, cantilevers and upper floors. Bye-laws introduced setbacks, floor-space limits and approval processes to control density, light and fire safety. Rising land costs shrank plots, so the courtyard gave way to the compact box. Today's best house plans try to recover the old climate wisdom — courtyards, shaded openings, cross-ventilation — inside the modern framework of regulations and RCC construction.
Step 1–2: the brief, the budget and the plot
Step one is a written brief. List who will live in the house now and in fifteen years: parents who may need a ground-floor bedroom, children who will grow up and perhaps marry, guests, domestic help, vehicles, a home office, a pooja room, storage for festivals and seasonal items. For each, note the room and its approximate size; Aaditya Interior's room-size guide gives standard dimensions for every room. Add the budget at the same time, split into land (if not already owned), construction, interiors, approvals and fees, and a contingency of 10–15 per cent. A brief without a budget produces a plan nobody can afford.
Step two is plot due diligence — and it should happen before buying, or at least before paying for design. The checks below are the ones that most often derail a project if left late. A lawyer and a local architect or engineer can complete them quickly; skipping them can leave a family with a plot on which the planned house cannot legally be built.
| Check | What to obtain or confirm | Why it matters |
|---|---|---|
| Title | Sale deed chain, mutation entries, encumbrance certificate | Confirms who owns the plot and that it is free of loans or claims |
| Land records | Revenue record such as the 7/12 extract (Gujarat, Maharashtra) or property card | Shows survey number, area, owner and land use as recorded |
| Land use / conversion | Non-agricultural (NA) permission where the land was agricultural | Residential construction generally requires appropriate land use |
| Layout approval | Approved layout plan or town-planning (TP) scheme final plot number | Plots outside approved layouts may face approval problems |
| Zoning | Development plan zone and road widths | Decides permissible use, FSI, height and setbacks |
| Boundaries and area | Survey by a licensed surveyor with a demarcated plan | The drawn plot must match the plot on the ground |
| Services | Road access, water connection, drainage or septic, electricity | Affects plinth level, tank sizes and cost |
| Soil | Soil investigation by a geotechnical engineer | Foundation type and depth depend on it |
Step 3–4: survey, soil and the rules of the plot
Step three is a measured survey and a soil investigation. The survey records the plot boundaries, levels, existing trees, neighbouring buildings, the road level and the positions of drains and electric poles. Levels matter more than people expect: in flood-prone parts of Surat and other low-lying cities, the plinth must sit well above the road and the surrounding ground, commonly 450–600 mm or more, and the drainage must fall away from the house. The soil investigation — boreholes and laboratory tests by a geotechnical engineer — tells the structural engineer the safe bearing capacity of the soil and the depth at which foundations can rest. On black cotton soil, common in parts of Gujarat and central India, which swells and shrinks with moisture, foundations need special care.
Step four is reading the development control rules that apply to the plot. They set the envelope inside which the house must fit. The key terms are simple once defined: setbacks (also called margins) are the open distances that must be left between the building and each plot boundary; ground coverage is the maximum share of the plot the building may cover; FSI (floor space index, also called FAR) is the total permitted built-up area divided by the plot area; and height limits cap the building's height, often by road width. Parking, open space and, increasingly, rainwater harvesting and solar provisions are also required.
| Development control term | What it controls | Where it is set | Planning effect |
|---|---|---|---|
| Setbacks / margins | Open space on each side of the building | Local bye-law (e.g. CGDCR in Gujarat), by road width and plot size | Fixes the maximum footprint |
| Ground coverage | Share of the plot the building may cover | Local bye-law, by zone | Limits footprint even inside setbacks |
| FSI / FAR | Total built-up area ÷ plot area | Development plan and bye-law, by zone and road width | Decides how many floors are worth building |
| Height | Maximum building height or floors | Bye-law, road width, airport and heritage limits | Affects floor-to-floor height choices |
| Parking | Number and size of car spaces | Bye-law, by unit size or area | Often decides the front setback design |
| Rainwater harvesting and solar | Recharge pits, tanks, rooftop solar provisions | Many state and city bye-laws | Space on terrace and in the margins |
| Fire and structural safety | Exits, stair widths, structural certification | NBC 2016 Part 4 and Part 6; local rules | Stair size and structure from the start |
Step 5: read the sun, the wind and the street
Step five is site analysis — the step most often skipped and the one that most decides whether a house is comfortable. In most of India, the hottest exposure is the west, where low afternoon sun strikes walls and glass at the hottest time of day, followed by the south, which receives sun for most of the day through the winter months. North light is steady and glare-free; east light is gentle and welcome in the morning. In Surat and much of coastal Gujarat, the summer and monsoon breezes come broadly from the south-west and west, which is why houses there benefit from openings on the windward side and outlets on the opposite side for cross-ventilation.
The practical moves follow directly. Put living spaces and bedrooms where they get north or east light and the prevailing breeze; put staircases, toilets, stores and the garage on the west, where they act as a thermal buffer; shade south windows with horizontal overhangs and west windows with vertical fins, jaalis or deep verandahs; and give every main room openings on two walls where possible, so air can pass through rather than stagnate. The street adds its own forces — noise, dust, privacy and the view of passers-by — which usually argue for a semi-open buffer such as a verandah, a parking porch or a planted margin between the road and the living room.
Step 6–7: zones, adjacencies and room-by-room plans
Step six turns the brief into a zoning diagram like Fig. 2 — public, semi-private, private and service zones placed on the plot by sun, breeze, road and privacy — and an adjacency list. Some adjacencies are non-negotiable in Indian homes: the kitchen next to the dining area and close to the utility; the pooja space in a calm spot, often near the living area or kitchen; a ground-floor bedroom with an attached toilet for elders or guests; the staircase near the entrance so upper floors can be reached without passing through the living room; and toilets stacked above each other to keep plumbing short.
Step seven is the floor plan itself. Rooms are sized from furniture and clearances — not from a list of "standard" sizes alone — and the plan is drawn to scale with door swings, windows and furniture. Fig. 3 shows a ground floor for the 7000 × 13000 mm footprint: a living room facing the road behind a foyer that screens it from the door, a dining area that links living and kitchen, a kitchen with a utility yard behind, a guest bedroom with its own toilet, and a dog-leg staircase on the west side acting as a thermal buffer. The first floor above holds three bedrooms and two toilets stacked over the ground-floor toilet and utility.
Step 8–9: structure and services
Step eight is the structure, and it should be drawn alongside the plan, not after it. Most Indian houses today are RCC framed structures — columns, beams and slabs — with brick or block infill walls. A regular column grid with spans of roughly 3–5 m keeps beams shallow and economical; columns should sit inside walls or at room corners where they do not land in the middle of a living room or a wardrobe. The structural engineer designs to the relevant Indian Standards: IS 456 for plain and reinforced concrete, IS 875 for design loads, IS 1893 for earthquake resistance, and IS 13920 for ductile detailing of reinforced concrete in seismic zones. Surat, like much of Gujarat, lies in a seismic zone where earthquake design is not optional, and the foundation design follows from the soil report — isolated footings, combined or raft foundations, or piles in poor soils.
Step nine is services. Plumbing is planned as stacks: toilets and kitchens placed one above the other wherever possible, with shafts or ducts that can be reached for maintenance, and slopes for drainage worked out before the slab is cast. Electrical planning follows the furniture layout — sockets beside the bed, at the study table, behind the TV unit, at kitchen counter height for appliances — and a load calculation sizes the cables and the meter. The overhead and underground water tanks, the septic tank or sewer connection, rainwater harvesting pits, rooftop solar panels, air-conditioner outdoor units and the drainage of the terrace all need space on the drawings. Every one of them is cheap to plan and expensive to retrofit.
Step 10–11: elevation, materials and approvals
Step ten is the elevation and the choice of materials — and it comes this late on purpose. A façade drawn first tends to force windows into the wrong places and add projections the structure did not plan for. Drawn after the plan, it can express the plan honestly: deeper shading on the west and south, larger glass on the north, a verandah or porch at the entrance, and a parapet and terrace designed for water tanks, solar panels and drainage. Materials are chosen for climate and maintenance as much as looks. In hot-humid cities, light-coloured exterior paint or cladding, shaded openings and insulated or reflective roof finishes reduce heat gain; natural stone, cladding tiles and exterior emulsions each have a cost and maintenance profile covered in Aaditya Interior's materials guides.
Step eleven is approvals. The architect or engineer prepares submission drawings — site plan, floor plans, sections, elevations, area statements and FSI calculations — in the format the local authority requires, along with ownership documents and structural certificates. Many Indian cities now accept online building-plan applications. Construction should begin only after the approval or development permission is in hand; building first and regularising later is a risk to the family's investment and, in many cases, to the house itself. On completion, an occupancy or building-use certificate is usually needed for permanent utility connections and for a clean title when the house is sold.
Step 12: estimate, contract and build
The final step is the estimate and the construction contract. A detailed estimate from working drawings — structure, masonry, plaster, flooring, doors and windows, plumbing, electrical, waterproofing, painting — is the only reliable way to know the cost. For early budgeting, per-square-foot ranges of built-up area are useful, provided they are understood as indicative. The bands below are indicative October 2026 estimates for construction of an independent house in tier-2 Gujarat cities such as Surat, excluding land, approvals fees, interiors and loose furniture; metros and difficult sites cost more.
| Construction level | Indicative cost (₹ per sq ft built-up) | What it typically includes | For a 1,940 sq ft G+1 house |
|---|---|---|---|
| Basic | ₹1,800–2,200 | RCC frame, brick or block walls, vitrified tiles, standard sanitaryware, economy paint | ≈ ₹35–43 lakh |
| Standard | ₹2,200–2,800 | Better tiles or granite, branded fittings, UPVC or aluminium windows, premium paint | ≈ ₹43–54 lakh |
| Premium | ₹2,800–3,800+ | Stone or large-format tiles, designer fittings, elevation cladding, higher-grade waterproofing | ≈ ₹54–74 lakh+ |
| Design and structural fees | Separate | Architecture, structure, approvals drawings, supervision | Quoted per project |
| Interiors | Separate | Kitchen, wardrobes, ceilings, lighting, furniture | See Aaditya Interior's interior cost guides |
The timeline is longer than most families expect, mainly because design and approvals happen before any work is visible. The table below gives typical durations for an independent G+1 house; monsoon months slow down excavation, foundations and external work, so a start date that puts the foundations in the dry season saves weeks.
| Phase | Typical duration | Key output |
|---|---|---|
| Brief, plot checks, survey, soil test | 2–6 weeks | Written brief, documents, survey plan, soil report |
| Concept design and revisions | 3–6 weeks | Zoning, floor plans, massing, rough budget |
| Structural design and working drawings | 4–8 weeks | Structural drawings, plumbing and electrical layouts, detailed estimate |
| Approval / development permission | 1–3 months (varies by city) | Sanctioned plans |
| Foundations and plinth | 1–2 months | Footings, plinth beam, plinth filling |
| Superstructure (G+1 frame, slabs, walls) | 3–5 months | Structure and masonry complete |
| Plaster, services, waterproofing, flooring | 3–4 months | Rough-in and finishes |
| Doors, windows, painting, fixtures, handover | 1–2 months | Snag list, completion and occupancy certificates |
Where house planning is heading
House planning in India is moving in three directions. The first is climate. Rising summer temperatures and electricity costs are making passive design — orientation, shading, cross-ventilation, insulated roofs — a financial decision, not just an aesthetic one. The Eco-Niwas Samhita, the residential energy code from the Bureau of Energy Efficiency, sets out envelope measures for homes, and green-building programmes such as GRIHA and IGBC reward them. Rooftop solar and rainwater harvesting are becoming standard rather than optional, and in many cities they are required by bye-laws.
The second direction is digital: survey drones, online plan approvals, 3D models that let families walk through a design before it is built, and coordinated drawings that catch clashes between beams, ducts and pipes on screen. The third is adaptability. Families increasingly plan a ground-floor bedroom that can serve an elderly parent, a first floor that can become a separate unit for a grown child, and a structure designed for a future floor. Planning for the next twenty years, not just the next two, is the most valuable habit any homeowner can adopt.
Rules for planning a house
- Write the brief and the budget together, with a 10–15% contingency, before any drawing starts.
- Complete title, land-record, land-use and zoning checks before buying or before paying for design.
- Get a measured survey and a soil investigation; let the soil report, not habit, decide the foundation.
- Read the bye-laws for setbacks, ground coverage, FSI, height and parking, and draw the buildable envelope first.
- Put living spaces and bedrooms on the north and east; use the west for stairs, toilets and stores as a heat buffer.
- Give every main room openings on two sides for cross-ventilation, and shade west and south openings.
- Stack toilets and kitchens vertically and plan shafts for maintenance.
- Draw the column grid with the plan so columns never land in the middle of rooms or furniture.
- Plan tanks, solar, AC units, rainwater harvesting and terrace drainage on the drawings, not on site.
- Start construction only after approval, and start foundations in the dry season.
Frequently asked questions
What is the first step in planning a house?
Write a brief and a budget together: who will live in the house now and in the future, the rooms they need with approximate sizes, and a realistic total budget split into construction, interiors, approvals, fees and contingency. Then check the plot's documents and zoning before paying for detailed design.
How do I know how much I can build on my plot?
The local development control regulations set it through setbacks, ground coverage, FSI and height limits, which depend on the zone, plot size and road width. Multiply the plot area by the permissible FSI for the total built-up area, and draw the setbacks to find the maximum footprint. An architect or engineer can confirm the figures from the development plan.
Which direction is best for a house in India?
For comfort in most Indian climates, living rooms and bedrooms do best facing north or east, with the west used for stairs, toilets, stores and garages as a buffer against afternoon heat. Many families also follow Vastu preferences, which can usually be accommodated alongside these climate principles with careful planning.
How long does it take to build a G+1 house?
Design, structural drawings and approvals typically take 3–6 months, and construction of a G+1 house typically takes 10–14 months, depending on size, specification, site conditions, monsoon timing and how quickly decisions are made. Interiors can add a further 2–4 months if they follow construction.
What is the construction cost per sq ft for a house in 2026?
Indicative October 2026 ranges for an independent house in tier-2 Gujarat cities such as Surat are about ₹1,800–2,200 per sq ft of built-up area for basic construction, ₹2,200–2,800 for standard and ₹2,800–3,800 and above for premium, excluding land, approvals, interiors and furniture. Confirm locally with a detailed estimate.
Do I need an architect to plan a house?
Building approvals in Indian cities require drawings signed by a registered architect or a licensed engineer, and the structure must be designed by a qualified structural engineer. Beyond compliance, an architect's main value is in planning — fitting the brief to the plot, the climate and the budget — which is where most of a house's comfort and cost are decided.
Sources & standards
- Bureau of Indian Standards — National Building Code of India 2016, Part 3 (Development Control Rules), Part 4 (Fire and Life Safety), Part 6 (Structural Design) and Part 8 (Building Services)
- Government of Gujarat — Comprehensive General Development Control Regulations (CGDCR): setbacks, FSI, ground coverage and approvals
- Bureau of Indian Standards — IS 456 (plain and reinforced concrete), IS 875 (design loads), IS 1893 Part 1 (earthquake-resistant design), IS 13920 (ductile detailing), IS 1904 (foundations)
- Bureau of Energy Efficiency — Eco-Niwas Samhita (Energy Conservation Building Code for residential buildings)
- GRIHA Council and Indian Green Building Council — green rating systems for homes
- Ernst and Peter Neufert — Architects' Data; Time-Saver Standards for Building Types
- Price ranges: indicative October 2026 estimates — confirm locally before budgeting