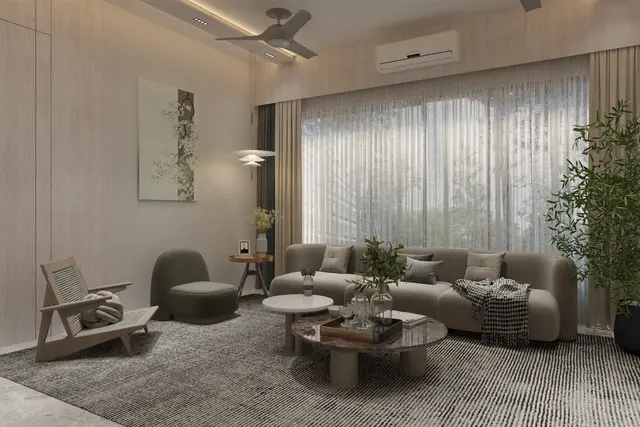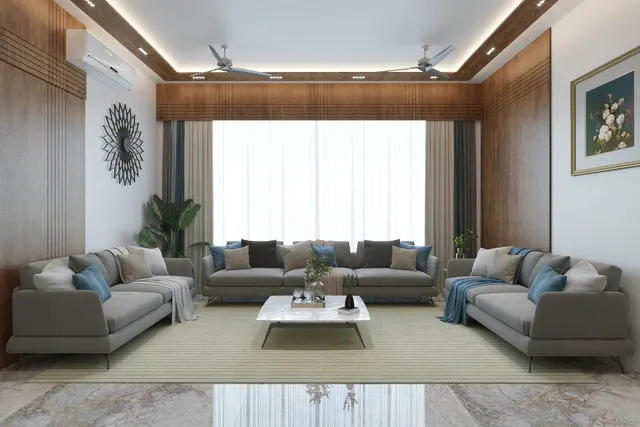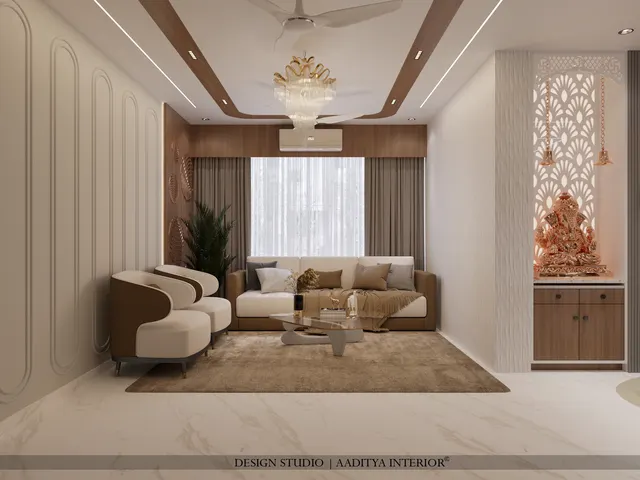

Cove lighting is the most requested ceiling feature in Indian living rooms and the most often botched. The idea is simple and old — hide a line of light in a recess so the ceiling and walls glow without a visible source — but the result depends entirely on a handful of dimensions and a wattage figure that are usually left to the site. A strip stuck into a shallow gypsum groove, too close to the wall, lights a hard bright line a few inches tall and then darkness; the same strip set back correctly in a properly proportioned pocket washes the whole upper wall in soft, even light. The difference is not the product. It is the detail.
The second common failure is wattage. Homeowners and even some contractors treat LED strip as one thing, when in fact it ranges from a feeble 4.8 watts per metre to a powerful 20-plus, with matching differences in brightness, heat and life. Choose too little and the cove is a decorative line that lights nothing; choose a cheap high-wattage strip without a heat-dissipating profile and it dims and yellows within a year. The third failure is invisible until it is too late: no plan for the driver, no access for future replacement, and a wall finish above the cove so uneven that the grazing light shows every trowel mark.
This article treats the cove as a construction detail, not a picture. It gives the pocket dimensions that make light spread evenly, the strip setback and lip height that hide the source, the wattage and colour-temperature choices for different jobs, and the driver and wiring rules that keep a cove working for years. The numbers are consistent with Indian trade practice and with the lighting guidance in the National Building Code Part 8.
What a cove is trying to do
A cove is indirect lighting: the light source is hidden and the light reaches the room only after bouncing off the ceiling or the wall. That bounce is what makes it soft — there is no bright point to glare, and the shadows are gentle. Because the light is spread over a large surface, the surface itself becomes the fixture, so the quality of that surface matters as much as the strip. A cove is almost always a secondary layer of light, setting mood and lifting the ceiling, rather than the light you read or cook by; expecting it to do a task light's job is the root of much disappointment. Understanding this decides every dimension that follows: the cove must present the strip's light to a surface, evenly, without ever showing the strip itself.
The pocket: dimensions that make a cove work
A cove pocket has four dimensions that decide whether it washes evenly. The drop — how far the cove soffit hangs below the ceiling — is usually 150 to 300 mm in Indian living rooms; too shallow and the pocket cannot hide the strip, too deep and it eats ceiling height. The setback is the horizontal distance from the strip to the wall it washes: 75 to 150 mm lets the beam open up and spread before it hits the wall, so there is no hard bright band. The lip is the vertical face that hides the strip from someone standing in the room; 50 to 100 mm is usual, tall enough to conceal the source from normal sightlines. And the opening gap — the clear space above the lip through which light escapes — should be at least 50 mm, so the cove does not throttle its own output.
| Cove dimension | Typical range | What it controls | If wrong |
|---|---|---|---|
| Drop below ceiling | 150–300 mm | Pocket size and hidden depth | Too shallow shows the strip; too deep lowers the room |
| Strip setback from wall | 75–150 mm | How evenly the wall washes | Too close lights a hard bright band |
| Lip (hiding face) height | 50–100 mm | Whether the strip is hidden | Too short shows dots from the sofa |
| Opening gap above lip | ≥ 50 mm | How much light escapes | Too tight dims the whole cove |
| Strip-to-ceiling distance (ceiling wash) | 50–100 mm | Even ceiling glow, no hot spots | Too close prints bright dots on the slab |
Wattage: how bright the strip must be
LED strip is sold by its power per metre, and that figure is the honest guide to brightness. Low-output strip at 4.8 to 7.2 watts per metre suits a subtle accent or a shallow pelmet; a living-room perimeter cove that should lift the whole room wants 9.6 to 14.4 watts per metre; and a cove expected to be the main light of a room, or set in a tall double-height space, needs 18 to 24 watts per metre with a proper aluminium profile to carry the heat away. Chip-on-board (COB) strip gives a continuous line of light with no visible dots and is worth the small premium in any cove where the strip might be glimpsed. Good strip delivers roughly 90 to 120 lumens per watt, so a 12-watt-per-metre run gives useful, even light without glare.
| Use | Suggested output | Type | Notes |
|---|---|---|---|
| Subtle accent, shallow pelmet | 4.8–7.2 W/m | SMD or COB | Mood only; not meant to light the room |
| Living-room perimeter cove | 9.6–14.4 W/m | COB preferred | The usual choice; even, soft wash |
| Bedroom headboard / pelmet glow | 7.2–9.6 W/m | COB, warm | Gentle; dimmable is a bonus |
| Sole-source or double-height cove | 18–24 W/m | COB on profile | Needs good heat dissipation and a bigger driver |
| Wet or semi-outdoor cove | 9.6–14.4 W/m | IP65 rated | Sealed strip for humidity and splashes |
Two practical rules keep wattage honest. First, always run the strip on an aluminium profile: LEDs lose brightness and life when they run hot, and the profile is the heatsink that keeps them cool. Second, never buy the cheapest high-wattage strip without a profile — it is the fastest route to a cove that dims unevenly and yellows in a season. The small extra spent on branded strip, a profile and a good driver is the difference between a cove that looks right for a decade and one that disappoints within a year.
Colour temperature and colour rendering
Colour temperature sets the mood. Warm light at 2700 to 3000 kelvin suits Indian living rooms and bedrooms, flatters wood, skin and traditional materials, and reads as calm and welcoming; neutral light at 3500 to 4000 kelvin is crisper and better for a study or a kitchen cove; cool light above 5000 kelvin looks clinical in a home and is best avoided in living spaces. Just as important is the colour rendering index (CRI), which measures how truthfully the light shows colour: a CRI of 80 is the minimum worth accepting, and 90 or above is well worth the premium wherever the cove washes wood, art or skin. Mixing colour temperatures around one room — a warm cove here, a cool one there — looks like a mistake, so keep the temperature consistent within a space.
Drivers, run lengths and wiring
Behind every cove is a driver — the power supply that converts mains to the strip's low voltage — and it is where many coves fail. The driver must be rated above the total load: add the strip's watts per metre times its length, then allow at least 20 per cent headroom, so a 10-metre run of 12-watt strip (120 watts) wants a 150-watt driver. Strip also suffers voltage drop over distance, so a single feed should not run too far: a 12-volt strip is usually limited to about 5 metres per feed, while a 24-volt strip can reach about 10 metres, which is why 24-volt is preferred for long cove perimeters. Longer runs need power injected at the mid-point rather than fed from one end, or the far end will be visibly dimmer.
The driver itself is the component most likely to fail, so it must sit somewhere reachable — above an openable panel, in a nearby shaft, or over a removable gypsum tile — never sealed inside a closed cove. Dimming, if wanted, must be chosen at the start, because it needs a dimmable driver and a compatible control; adding it later means opening the cove. All of this is decided before the boards close, which is why cove wiring is planned with the electrical layout, not improvised when the strip is bought.
Cove types and where they belong
Not every cove is a perimeter border. The perimeter cove runs around the whole edge of the room and lifts the entire ceiling, which is why it is the most requested, but it is also the most expensive because its running length is the greatest. A single-wall cove over a feature wall — the television wall, the headboard wall — concentrates the effect and the budget where it is wanted, and is often the smarter choice in a bedroom. A floating or island cove surrounds a central dropped ceiling panel to define a zone, such as a dining table or a seating island, within a larger open space. A pelmet cove hides above the curtains and washes the drape, and a backlit niche puts a line of light behind a panel or an object to make it glow. Each belongs in a different place and carries a different cost.
| Cove type | Where it goes | Effect | Relative cost |
|---|---|---|---|
| Perimeter | Around the room edge | Lifts the whole ceiling | Highest — most running feet |
| Single-wall | Over one feature wall | Highlights the TV or bed wall | Low — short run |
| Floating island | Around a central dropped panel | Defines a dining or seating zone | Medium |
| Pelmet cove | Above the curtains | Washes the drape | Low to medium |
| Backlit niche | Behind a panel or object | Makes it glow | Low — small length |
The choice is a budget decision as much as a design one. A family that wants the effect but not the perimeter price can put a single-wall cove over the sofa-back wall and a pelmet cove over the curtains, and achieve a layered, lit room for a fraction of the running feet. Spending the strip where it shows — the walls people face, the drape, the feature — gives a better result than wrapping a thin, under-powered line around a whole ceiling simply because that is the default picture.
Costs, and the detailing that protects them
Installed cove LED strip lists at about ₹150–300 per running foot in the Indian market (indicative October 2026), and that figure normally bundles the strip, the aluminium profile, a share of the driver and the labour. The range is wide because the components vary enormously: a bare stick-on strip on a no-name driver sits at the bottom, while COB in a recessed profile on a branded dimmable driver sits at the top. For a typical 12 by 12 foot bedroom, the cove perimeter runs about 40 running feet after the door side is deducted — roughly ₹6,000 at the budget end and ₹12,000 at the quality end, before dimmers. The gypsum cove itself is part of the false-ceiling cost, where a designer ceiling with coves runs about ₹80–180 per square foot.
| Item | Indicative cost (October 2026) | Includes |
|---|---|---|
| Cove LED strip, installed | ₹150–300 per running ft | Strip, aluminium profile, driver share, labour |
| 12×12 ft bedroom cove (≈ 40 rft) | ₹6,000–12,000 | Perimeter run before dimmers |
| Designer gypsum ceiling with cove | ₹80–180 per sq ft | Layered boards, cove trays, curves; lighting extra |
| Dimmable driver and control (optional) | Added at the top of the band | Dimmable driver plus compatible switch or keypad |
The cheapest way to protect this money is correct detailing and timing. Skim the wall above the cove flawlessly, because grazing light shows every defect; set the strip back far enough to wash evenly; buy strip on a profile with a properly sized, accessible driver; and wire it before the boards close. A cove done this way looks considered and lasts; a cove improvised on site looks like a bright line and fails early, and reopening a finished cove to fix it is destructive and expensive.
Rules for detailing a cove
- Set the strip back 75–150 mm from the wall so the light opens up and washes evenly.
- Keep a lip of 50–100 mm to hide the strip from anyone seated in the room.
- Leave an opening gap of at least 50 mm above the lip so the cove does not choke its own light.
- Choose wattage for the job: 9.6–14.4 W/m for a living-room perimeter, more only for a sole-source cove.
- Always mount the strip on an aluminium profile, and prefer COB where the strip might be glimpsed.
- Use 2700–3000K warm white in living and sleeping spaces, with CRI 80 or more (90+ over wood and art).
- Size the driver at 1.2 times the load, feed 24-volt strip about every 10 metres, and keep the driver accessible.
- Skim the wall above the cove perfectly, and wire everything before the gypsum closes.
Frequently asked questions
How far should an LED strip be from the wall in a cove?
About 75 to 150 mm. That setback lets the beam open up and overlap before it reaches the wall, so the surface washes evenly from the cove line upward. A strip pushed close to the wall lights a hard bright band at the top and leaves the rest dark, which is the most common cove mistake.
What wattage LED strip is best for cove lighting?
For a normal living-room perimeter cove, 9.6 to 14.4 watts per metre of good COB strip gives an even, soft wash. Subtle accents can use 4.8 to 7.2 watts per metre, while a cove meant to be the main light of a room, or in a double-height space, needs 18 to 24 watts per metre on an aluminium profile to carry the heat.
Which colour temperature is right for a cove?
Warm white at 2700 to 3000 kelvin suits living rooms and bedrooms and flatters wood and skin; 3500 to 4000 kelvin neutral suits a study or kitchen cove. Avoid cool light above 5000 kelvin in living spaces, and keep one colour temperature per room so it does not look like a mistake. Insist on a colour rendering index of 80 or more.
Can cove lighting be the only light in a room?
Only if it is designed for it. A cove can be the sole source in a small or transitional space if it uses high-output strip (18–24 watts per metre) on a good profile, but in a living room or bedroom it works best as one layer among task and accent lights. Expecting a modest decorative cove to light a whole room is a common disappointment.
Sources & standards
- National Building Code of India 2016, Part 8 (Building Services), Section 1 (Lighting and Ventilation)
- Bureau of Indian Standards — IS 3646 (Code of Practice for Interior Illumination)
- Energy Conservation Building Code (ECBC) — interior lighting power guidance
- Bureau of Energy Efficiency (BEE) — LED and luminaire efficiency labelling
- Manufacturer standard specifications for LED strip output, CRI, drivers and aluminium profiles, described generically
- Price ranges: indicative October 2026 estimates — confirm locally before budgeting