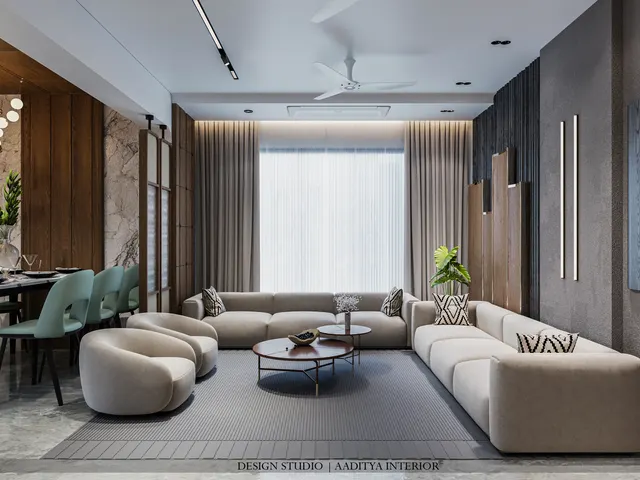
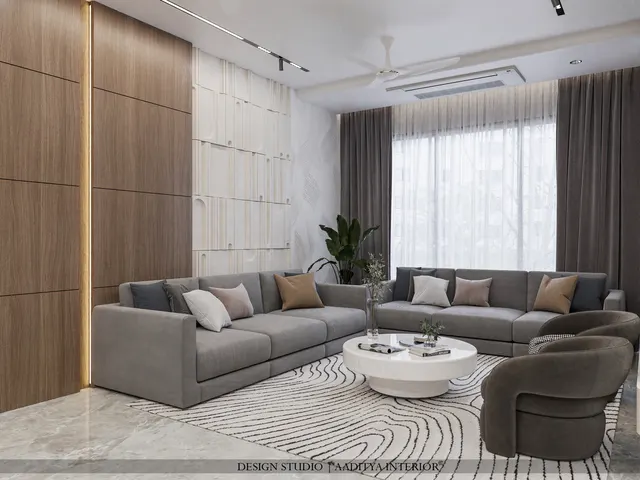
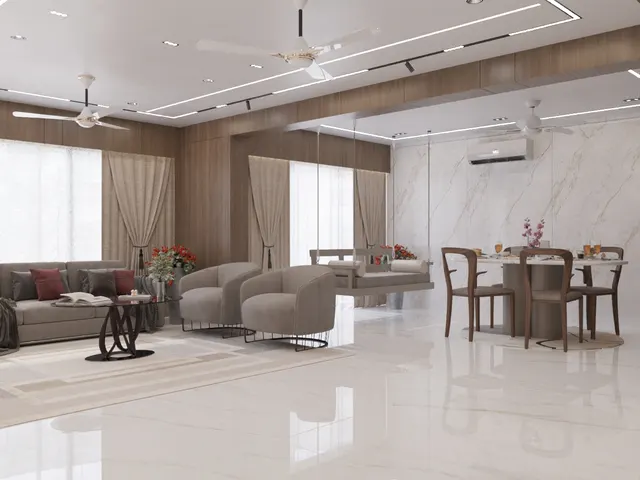
Most false ceilings are lit as an afterthought: a grid of identical downlights punched into gypsum, all switched together, all the same colour. The result is flat, shadowless light that makes every room feel like a corridor. Professional ceiling lighting works in three layers instead — a cove that washes the ceiling with warm ambient light, spots that put task light where work happens, and pendants that mark the dining table or the pooja corner as places of focus. Each layer has its own circuit, its own colour temperature and its own job, and the whole plan is drawn before the ceiling grid is frozen, because moving a light point after the boards are up means cutting open a finished ceiling.
The sequencing rule is the heart of this article: the lighting plan must be frozen before the false-ceiling frame goes up. Every spot needs a cut-out in the 12.5 mm gypsum board (IS 2095 Part 1), every pendant needs a marked and reinforced point, and every cove needs its ledge built into the ceiling profile. Electricians wire to the plan; the ceiling contractor cuts to the plan; the painter paints last. When the order reverses — ceiling first, lights later — the result is spots that miss the furniture they were meant to light and pendants that hang off-centre forever.
This article gives the working numbers for all three layers: cove construction and colour temperature, spot spacing and beam logic, pendant drops, the lux targets each room must hit, and what each ceiling type costs installed. Dimensions are in millimetres; prices are indicative October 2026 bands.
The three layers and their jobs
| Layer | Specification | Job |
|---|---|---|
| Cove / concealed strip | 2700–3000K LED strip in a gypsum ledge — commonly cited practice | Ambient wash; the room's base light, glare-free |
| Spots / downlights | 4000K over work zones, 3000K over seating — lighting design convention | Task light: kitchen counters, study desks, art walls |
| Pendants | 750–900 mm above dining tables — commonly cited practice | Focus: marks the dining table, island or pooja corner |
| Gypsum board | 12.5 mm thick, 2440 × 1220 mm — IS 2095 (Part 1) 2011 | The ceiling substrate every layer mounts into |
| Living room target | 100–300 lux ambient — CIBSE Code for Lighting | Cove plus spots on separate circuits |
| Dining target | 200 lux service — IS 3646-1 | Pendant provides it locally over the table |
| Kitchen task target | 500 lux for food preparation — IS 3646-1 | Spots over the counter, not just the room centre |
| Corridor target | 100 lux service — IS 3646-1 | One layer suffices; cove here is overspend |
Colour temperature is the layer's identity. Cove light at 2700–3000K keeps the room warm and restful in the evening; spots over work zones shift to 4000K where task clarity matters; and the single most common lighting mistake in Indian homes — mixing 2700K and 6500K fittings in one room — is avoided by specifying the colour temperature per circuit on the plan itself. A room where the cove glows warm and the spots burn cool-white over the same sofa looks broken, because it is: the eye reads the mismatch before it reads the furniture.
The reflected ceiling plan: draw it like a floor plan
The reflected ceiling plan (RCP) is the drawing that prevents every classic mistake. On one sheet, at the same scale as the floor plan, it shows every spot as a circle, every pendant as a marked point with its drop height, every cove as a hatched band, and every switch circuit as a label. Spots are spaced 900–1200 mm apart in a grid over work zones — closer spacing wastes fittings, wider spacing leaves dark patches — and kept 600–900 mm off walls so the beam washes the wall rather than grazing it. The pendant point is located from the dining table's centre, not from the room's centre, because the two rarely coincide in open plans. The RCP is signed off before the gypsum frame is built; any light point added after that is a cut-and-patch job.
Circuits and switching: the part nobody sees
Three layers on one switch is the same as one layer — the design dies at the switchboard. Each layer gets its own circuit and its own switch: cove on one, spots on another, pendants on a third. Dimmers on the cove and pendant circuits cost little and transform the room from task mode to evening mode; spots over work zones stay on simple switches. The switch positions follow the door — the most-used layer's switch nearest the entrance — and a two-way switch at the bedroom door for the cove saves the nightly walk across a dark room. Wire for the plan, label the distribution box per circuit, and photograph the wiring before the boards close: the photograph is worth more than any as-built drawing when a fitting needs changing five years later.
What ceiling lighting costs
Budget the ceiling and the lights as two separate lines, because contractors quote them separately and clients routinely forget the second. The ceiling itself: plain gypsum with painting at ₹60–80 per sq ft installed, POP at ₹70–100, PVC panels at ₹50–90, and designer gypsum with cove profiles at ₹80–180 — the cove roughly doubles the ceiling cost. The lights: cove LED strip at ₹150–300 per running foot installed, panel and spot lights at ₹400–1,200 per piece, and designer pendants at ₹2,000–15,000 per piece. A 150 sq ft living room with a cove on two sides, twelve spots and one pendant typically lands the lighting hardware alone in the ₹25,000–60,000 band before the ceiling cost — which is why the hardware line must be in the quotation from day one.
| Item | Indicative range, excl. GST | Notes |
|---|---|---|
| Gypsum ceiling, with painting | ₹60–80 / sq ft installed | Flat ceiling; 12.5 mm board per IS 2095 |
| Gypsum designer ceiling with cove | ₹80–180 / sq ft installed | Layered profiles plus cove ledge |
| POP ceiling | ₹70–100 / sq ft installed | Curves and ornament; slower to execute |
| PVC panels | ₹50–90 / sq ft installed | Budget option; limited design range |
| Cove LED strip, installed | ₹150–300 / running ft | 2700–3000K for living and bedrooms |
| Panel / spot lights | ₹400–1,200 / piece | One per 900–1200 mm grid point over work zones |
| Designer pendant | ₹2,000–15,000 / piece | Needs a marked, reinforced ceiling point |
Where each layer works, and where it backfires
- Cove at 2700–3000K: the right ambient for living rooms and bedrooms; backfires in kitchens, where 4000K task light is needed.
- Spots on a 900–1200 mm grid over work zones: light where it is used; avoid gridding the whole ceiling uniformly — it wastes fittings and flattens the room.
- Pendant over the dining table at 750–900 mm: marks the focus; avoid hanging it from the room's centre when the table sits elsewhere.
- Three separate circuits with dimmers on cove and pendant: the difference between task mode and evening mode; avoid one switch for everything.
- 4000K spots in kitchen and study, 3000K in living zones: task clarity where needed, warmth where people relax; never mix colour temperatures on one circuit.
- Photographing wiring before boards close: free insurance for every future change; avoid trusting memory for what is hidden above gypsum.
- Freezing the RCP before the frame: the single decision that prevents off-centre pendants and misplaced spots; anything added later is cut-and-patch.
The final check happens before the painter arrives: every circuit is switched on separately, every spot's beam lands where the plan said it would, the pendant hangs over the table's centre, and the cove glows without a visible LED dot — a diffuser or a deep enough ledge hides the individual diodes. Only then is the ceiling finished. A false ceiling is the most expensive surface in the room to redo; lighting it right the first time is not a luxury, it is the whole point of building it.
Sources & standards
- IS 2095 (Part 1) 2011 — gypsum plaster boards 12.5 mm thick, 2440 × 1220 mm (via technical reference pack).
- IS 3646-1 (1992) — service illuminance: corridors 100, dining rooms 200, food preparation 500 lux.
- CIBSE Code for Lighting — residential lounge 100–300 lux.
- Commonly cited practice — cove 2700–3000K, pendant 750–900 mm above table, spot grid 900–1200 mm.
- IndiaMART dealer listings, October 2026 (indicative) — ceiling, strip, fitting and pendant price bands.