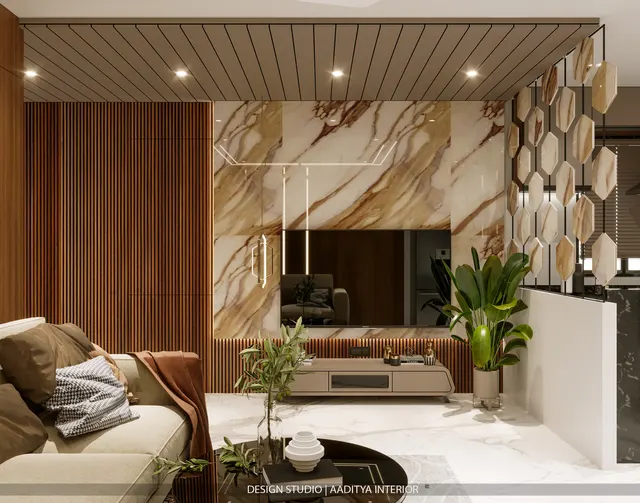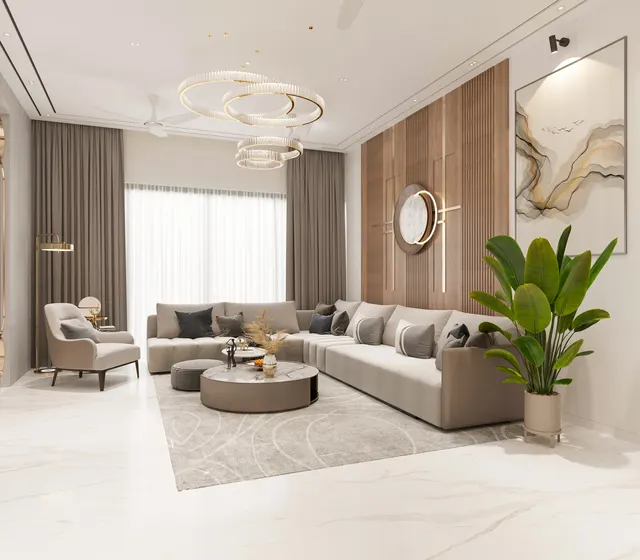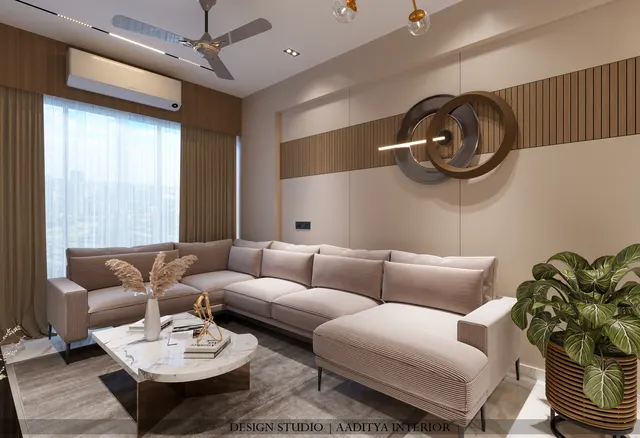

The commonest living room in an Indian flat is lit by a single fitting in the middle of the ceiling — once a tube light, now a round LED panel — switched on and off at the door. It floods the centre of the room with flat, even light, leaves the corners and the walls in shadow, throws a hard shadow under everyone's chin, and offers exactly one setting: fully on or fully off. The room looks the same at four in the afternoon as it does at ten at night, whether the family is watching a film, reading, or receiving guests. It is the lighting equivalent of painting every wall the same grey and calling it a scheme.
Good living-room lighting is not one brighter fitting; it is several modest ones, placed for the things people actually do, and wired so they can be used in different combinations. Designers call this layered lighting, and it rests on a simple idea borrowed from daylight: a real room is never lit evenly. The sun washes one wall, a window pools light on the floor, a lamp marks the reading chair. The eye finds a room with light and shade far more comfortable, and far more flattering, than a room lit to one uniform level. A layered plan recreates that variety deliberately, with an ambient layer for general brightness, a task layer where close work happens, and an accent layer that lifts the surfaces worth looking at.
This article sets out a layered lighting plan for an Indian living room in practical terms: why one central light fails, the three layers and what each is for, how bright the room should be in lux and what colour the light should be in kelvin, how to lay the fittings out on a reflected ceiling plan, how to switch and dim them so the room has moods rather than a single state, and what the whole kit costs. Figures are indicative October 2026 ranges, and lux and colour values follow the illumination guidance of IS 3646 and the National Building Code of India 2016, Part 8.
Why one light in the middle is the problem
A single fitting at the centre of the ceiling fails for reasons that are easy to see once they are named. Because all the light comes from one high point, it falls almost vertically, so faces are lit from above and the hollows of the eyes and the area under the chin go dark — the same unflattering light that makes passport photographs grim. Because the source is in the centre, the walls and corners receive the least light of all, so the room reads as a bright middle surrounded by gloom, which makes it feel smaller than it is. And because there is only one circuit, the room has a single brightness: there is no way to drop the level for a film, lift it for cleaning, or pool it around the sofa for reading. The light serves the room's dimensions, not the life inside it.
Layering fixes each of these faults at once. Spreading the ambient light to the edges of the ceiling, or bouncing it off the walls through a cove, lifts the whole room evenly and makes it feel larger. Adding task light beside the reading chair means a person can read without flooding the entire room. Washing the television wall or a painting with accent light gives the eye something to settle on and hides the dark rectangle a switched-off television becomes. And putting the layers on separate switches turns one rigid setting into several: a bright everyday scene, a soft evening scene, and a low scene for watching something on screen. The fittings need not be expensive; it is the thinking, and the wiring, that make the difference.
The three layers of living-room light
Every considered lighting scheme is built from three layers, and a living room usually wants all three, with decorative fittings as an optional fourth. The ambient layer is the general wash that lets people move about safely and see the whole room — a cove around the perimeter, a run of recessed downlights, or wall-washers that lift the vertical surfaces. The task layer is concentrated light for close activity: a floor or table lamp beside the reading chair, a pendant low over a games or dining spot within the living space. The accent layer is directional light aimed at something worth seeing — a picture, a textured feature wall, a plant, the television wall — at roughly three times the brightness of its surroundings so it draws the eye. Decorative fittings, a chandelier or a sculptural pendant, are the jewellery: they are looked at rather than relied on to light the room.
| Layer | What it does | Typical fittings | Living-room use |
|---|---|---|---|
| Ambient | General even wash; move about safely | Cove LED, recessed downlights, wall-washers | Perimeter cove plus a few spots |
| Task | Concentrated light for close work | Floor lamp, table lamp, low pendant | Reading chair, study corner |
| Accent | Draws the eye to a surface | Adjustable spots, picture light, strip | Art, feature wall, television wall |
| Decorative | Looked at, not relied on | Chandelier, sculptural pendant | Centre of the seating or over a table |
How bright, and what colour
Two numbers settle the feel of the light: how bright it is, measured in lux, and what colour it is, measured in kelvin. A living room is a relaxing, multi-purpose space, so it does not need the high levels of an office or a kitchen worktop. Illumination guidance in IS 3646 and the National Building Code of India 2016, Part 8, places general living-room lighting in the region of about 100 to 300 lux — a comfortable 150 lux or so for ordinary evenings, lifted to around 300 lux where someone reads. The mistake owners make is to chase a single high number everywhere, which produces the flat, over-lit look of a showroom. The better aim is a modest ambient level with brighter pools exactly where they are needed, so the average is low but the useful light is high.
Colour temperature decides whether the room feels warm and restful or cool and clinical. Warm white, around 2700 to 3000 kelvin, is right for a living room: it flatters skin and timber, suits the evening, and matches the warm light Indian homes have always used. Cool white, 4000 kelvin and above, belongs on a kitchen worktop or a study desk, not a sofa. Just as important as the kelvin value is keeping it consistent: a room with some fittings at 3000 K and others at 4000 K looks broken, as if half the bulbs were the wrong ones. The colour rendering index, or CRI, measures how truthfully colours appear under the light; a CRI of 80 or more is fine for general use, and 90 or more is worth paying for on accent fittings that light art, fabric or skin.
| Zone or task | Indicative lux | Colour temperature | Note |
|---|---|---|---|
| General ambient | 100–150 lux | 2700–3000 K | Everyday evening level |
| Reading chair / study corner | 300–500 lux | 2700–3000 K | Local task light, not whole room |
| Accent on art / feature | ≈ 3× its surroundings | 3000 K, CRI ≥ 90 | Draws the eye |
| Television wall (bias light) | Low, soft | 2700–3000 K | Cuts screen glare and eye strain |
| Circulation at night | Low, floor level | 2200–2700 K | Sensor night light |
It helps to picture colour temperature as a scale running from the warm, candle-like light of a diya at the low end to the cool, daylight-like light of an overcast sky at the high end. A living room belongs firmly at the warm end, around 2700 to 3000 kelvin, because that is the light the eye associates with evening, rest and company; pushing it towards 4000 kelvin and beyond makes the same room feel like a shop or an office, however expensive the furniture. The figure below places the common values on that scale, and the single most useful discipline it suggests is consistency: choose one warm value for the whole room and specify it on every fitting, because a room in which a few bulbs are visibly cooler than the rest looks accidental, as though someone simply bought the wrong box.
Laying out the reflected ceiling plan
A reflected ceiling plan is simply the ceiling drawn as if seen in a mirror on the floor, with every fitting marked in position. Drawing one before buying anything is the single most useful step, because it forces decisions about spacing and grouping that are impossible to judge once the ceiling is closed. For recessed downlights or spots, a common spacing is about 1200 to 1500 millimetres apart, kept roughly 300 to 400 millimetres clear of the wall so they graze and light the vertical surface rather than the skirting. A perimeter cove is set 150 to 300 millimetres below the slab with its LED strip hidden in an upstand so no dots are visible, only an even wash. Fittings should be placed by what is below them — a spot over the centre of the seating, a pair flanking the television, a pendant centred on the coffee table — not dropped onto a tidy grid that ignores the furniture.
| Fitting | Typical spacing / position | Why |
|---|---|---|
| Recessed spot / downlight | 1200–1500 mm apart | Even wash without a runway of dots |
| Spot near a wall | 300–400 mm off the wall | Grazes and lights the vertical surface |
| Perimeter cove | 150–300 mm below the slab | Hides the strip; washes the ceiling edge |
| Central pendant | Centred on the coffee / dining spot | Reads as the room's focus |
| Picture / accent spot | Aimed at the art, 30° from vertical | Lights the work, avoids glare and hotspot |
Switching, grouping and scenes
Layers are only useful if they can be controlled separately, so the wiring matters as much as the fittings. At the very least, the ambient wash, the task lights and the accent lights should be on three different switches, so the room can be set bright for cleaning, soft for the evening, and low for a film. Two-way switching — the ability to turn the main lights on at the door and off again from the sofa, or the other way round — is a small addition at wiring stage and a daily convenience nobody regrets. Dimmers add another dimension: a dimmed warm LED not only lowers the level but shifts slightly warmer, which suits the evening. Where the budget allows, a simple scene controller or a smart switch can store whole combinations — a bright scene, an evening scene, a film scene — recalled with one touch.
- Put ambient, task and accent on at least three separate switches so the room can change mood.
- Add two-way switching for the main lights between the door and the seating.
- Dim the ambient layer rather than brightening it — a living room is rarely at full output.
- Keep every fitting in the room at one colour temperature, 2700–3000 K, so nothing looks mismatched.
- Light walls and art, not just the floor — lit vertical surfaces make a room feel larger.
- Place spots by the furniture below them, not on a tidy grid that ignores the sofa.
- Add a soft bias light behind or beside the television to cut screen glare and eye strain.
- Hide every LED strip in a proper upstand or channel so the wash is even and no dots show.
- Plan the wiring and driver access before the false ceiling closes; opening it later is destructive.
- Choose CRI 90 or more for accent fittings that light art, fabric or people.
Fittings and what they cost
The hardware of a layered scheme is modest against the cost of the furniture it lights, and it is quoted separately from the false ceiling it often sits in, which is why owners so often forget to budget for it. The ambient cove uses an LED strip in an aluminium channel, costing roughly ₹150 to ₹300 per running foot installed; a living room with a cove on two or three sides might need thirty to sixty running feet of it. Recessed spots and panel lights run about ₹400 to ₹1,200 each depending on quality, driver and beam. A decorative pendant or chandelier is priced as a design item, anywhere from ₹2,000 to ₹15,000 and well beyond for statement pieces. Floor and table lamps for the task layer sit alongside the furniture budget. For a typical 150 square foot living room with a cove, around a dozen spots and one pendant, the lighting hardware alone usually lands in the ₹25,000 to ₹60,000 band before the ceiling cost, and that figure deserves its own line in the quotation from day one.
| Item | Unit | Indicative Oct 2026 cost |
|---|---|---|
| Cove LED strip (in channel) | Per running foot installed | ₹150–300 |
| Recessed spot / panel light | Per piece | ₹400–1,200 |
| Decorative pendant / chandelier | Per piece | ₹2,000–15,000+ |
| Dimmer / smart switch module | Per circuit | ₹600–3,500 |
| 150 sq ft room — lighting hardware | Whole room | ₹25,000–60,000 |
Where living-room lighting is heading
The direction of travel is towards light that adjusts itself to the hour and the task rather than sitting at one fixed setting. Tunable-white fittings, which shift from warm evening light to cooler daytime light on the same circuit, are moving from premium projects into ordinary homes, and they suit the Indian habit of using the living room through the whole day. Sensor and app control lets scenes change automatically — a low night-light path after midnight, a brighter scene when the room is occupied in daylight — without anyone touching a switch. None of this replaces the basics: the layers still have to be designed, the fittings still have to be placed by the furniture, and the colour still has to be warm and consistent. Technology makes a good plan more convenient; it cannot rescue a bad one. A living room lit in three warm, well-placed, separately switched layers was comfortable before smart controls existed and will stay comfortable long after any particular gadget is obsolete.
Frequently asked questions
How many downlights does a living room need?
Fewer than most people fit. A living room is a relaxing space, not a worktop, so it wants a modest ambient level lifted by brighter pools where they are needed, not a ceiling studded with spots at every metre. As a guide, space recessed spots about 1200 to 1500 millimetres apart and keep them 300 to 400 millimetres off the walls, then let a perimeter cove and the task and accent layers do the rest. A 150 square foot living room is usually well served by a cove plus around eight to twelve spots and one pendant, all on separate switches, rather than twenty downlights on one circuit.
What colour temperature is best for a living room?
Warm white, around 2700 to 3000 kelvin, is the right choice for a living room: it flatters skin and timber, suits the evening and matches the warm light Indian homes traditionally use. Cooler light of 4000 kelvin and above belongs on a kitchen worktop or a study desk. Whatever value is chosen, keep every fitting in the room at the same colour temperature, because a mix of warm and cool fittings looks broken. For accent lights on art or fabric, choose a colour rendering index of 90 or more so colours appear truthfully.
Is a false ceiling necessary for cove lighting?
Not always. A perimeter cove is the neatest way to hide an LED strip and wash the ceiling, and it usually sits in a dropped gypsum border, but the same effect can be had from a slim wall-mounted cove profile, a pelmet above the curtains, or a shelf detail, none of which needs a full false ceiling. What matters is that the strip is hidden in an upstand or channel so only the wash is seen, not the dots, and that the driver remains accessible for future replacement. If a false ceiling is being built anyway, integrating the cove into it is sensible; if not, surface profiles give much of the effect without one.
Should the television wall be lit?
Yes, gently. Watching a bright screen in a dark room forces the eye to adapt constantly between the bright rectangle and the dark surround, which causes fatigue and headaches. A soft bias light — a warm LED strip behind or beside the television, or a low wash on the wall around it — raises the surround brightness and removes that harsh contrast, making long viewing far more comfortable. Keep it warm, around 2700 to 3000 kelvin, and dimmable, and never aim a bright spot at the screen itself, which only adds reflections.
Sources & standards
- National Building Code of India 2016, Part 8 — Building Services (lighting and ventilation)
- Bureau of Indian Standards, IS 3646 — Code of Practice for Interior Illumination (recommended illuminance)
- Bureau of Indian Standards, IS 732 — Code of Practice for Electrical Wiring Installations
- Neufert, Architects' Data — lighting levels, fitting layout and room planning
- Illuminating Engineering guidance on colour temperature and colour rendering index (CRI) ranges
- Price ranges: indicative October 2026 estimates — confirm locally before budgeting