Lighting is usually the last thing decided in an Indian home and the first thing noticed. The false ceiling is drawn, the electrician arrives, and the lights are placed wherever the ceiling grid happens to fall: a row of downlights down the middle of every room, a strip in every cove, and one bright tube light in the kitchen. The flat ends up either glaring or gloomy — often both, in different rooms — and the family spends the next ten years living with a ceiling that is the most expensive surface in the house to redo.
A 3BHK makes the problem bigger. There are typically eleven or twelve distinct spaces — living, dining, kitchen, three bedrooms, two or three bathrooms, a foyer, a passage, a utility and one or two balconies — and each one has a different job. A kitchen counter needs about five times the light of a passage. A bedroom needs warm, low light at night and a strong reading light on one side of the bed. A bathroom mirror needs light from the sides, not from above. One rule applied to all of them produces a flat that works nowhere.
This article lays out a complete lighting plan for a typical 3BHK of about 1,250 sq ft carpet area, room by room. It starts from the light level each space needs, explains how to turn that into a number of fittings, shows where they go and how they are switched, and finishes with a realistic budget. The figures are for apartments, but the same method works for bungalows and row houses.
From tube lights to layered LED: a short history
For most of the twentieth century, an Indian flat was lit by a single fitting per room: an incandescent bulb, then the 4-foot fluorescent tube light that became the default in kitchens, offices and living rooms alike. The tube light was efficient for its time and gave plenty of light, but it lit every room the same way — flat, cool and from one point in the centre of the ceiling. Compact fluorescent lamps arrived in the 1990s and 2000s and cut electricity bills, but they did not change the idea of one light per room.
LED changed both the economics and the design. Once LED bulbs became cheap — the government's UJALA programme, launched in 2015, distributed LED bulbs at very large scale and helped drive prices down — it became affordable to put many small, low-wattage sources in a room instead of one large one. That is what made the layered approach common in Indian homes: a cove for soft background light, downlights or spots for specific tasks, and a pendant or wall light for character. The risk today is the opposite of the old one: too many lights, placed by habit, with no plan for how bright each room should actually be.
Step one: how much light each room needs
Light level on a surface is measured in lux — lumens per square metre. The Indian standard for interior lighting, IS 3646 (Part 1):1992, gives recommended illuminance ranges for many activities, including dining at 150–200–300 lux, food preparation and cooking at 300–500–750 lux, and corridors at 50–100–150 lux, with the middle figure as the service level to design to. For rooms the Indian standard does not cover directly, designers commonly use the CIBSE Code for Lighting, which puts residential lounges at about 100–300 lux and bedrooms lower. The table below gathers the figures this site uses throughout its lighting guides.
| Space | Design light level | Basis | Colour temperature | Notes |
|---|---|---|---|---|
| Living room — general | 100–300 lux | CIBSE Code for Lighting (lounge) | 2700–3000 K | Dimmable; three moods: day, evening, movie |
| Living room — reading chair | 300–500 lux at the page | Commonly cited task level | 3000 K | Floor lamp or a directed spot |
| Dining table | 200 lux | IS 3646-1 service level | 3000 K | Pendant over the table centre |
| Kitchen counter and hob | 500 lux | IS 3646-1 service level | 4000 K | Under-cabinet strips, not just ceiling lights |
| Kitchen general | 150–300 lux | CIBSE residential kitchen | 3500–4000 K | Ceiling panels on a separate switch |
| Bedroom — general | 50–150 lux | CIBSE guidance; varies by source | 2700–3000 K | Low and warm; dimmable |
| Bedside reading | 300 lux at the page | Commonly cited task level | 2700–3000 K | Wall light or lamp, shade at seated eye level |
| Study desk | 300–500 lux | IS 3646-1 office range | 4000 K | Task lamp on the side opposite the writing hand |
| Bathroom — general / mirror | 150 lux / several hundred at the face | CIBSE; commonly cited practice | 3000 K / 4000 K | Light the face from the sides |
| Foyer / entrance | 150–200 lux | IS 3646-1 entrance halls | 3000 K | Brightest point of arrival |
| Passage | 100 lux | IS 3646-1 service level | 3000 K | One layer is enough |
Two things stand out. First, the numbers vary by a factor of five or more across a single home, which is why one ceiling grid cannot serve every room. Second, the brightest targets are for tasks on specific surfaces — the counter, the desk, the page, the face at the mirror — not for whole rooms. That is the key to the layered method: keep the general level modest and put concentrated light exactly where the task happens.
The three layers, applied to every room
Every room in the plan is designed with up to three layers, each on its own switch. The ambient layer gives the room its general light level: a cove, panels or a few wide-beam downlights. The task layer puts higher light on work surfaces: under-cabinet strips in the kitchen, a desk lamp, a reading light, mirror lights. The accent layer adds character: a pendant over the dining table, spots on art or a textured wall, a backlit jaali or a pooja niche. Not every room needs all three — a passage needs only ambient, a utility needs only task — but the main rooms should have at least two.
Fig. 1 shows the plan this article uses: a 13.2 × 8.8 m flat with a 5.4 × 5.2 m living room, a dining area opening off it, an L-shaped kitchen, three bedrooms of about 3.0–3.3 × 3.6 m, three bathrooms, a foyer, a passage and a utility. The symbols show the layers in each room. The sections below take the rooms one at a time.
Step two: turning lux into a number of lights
Lux targets are useful only if they can be converted into fittings. A simple method, good enough for homes, uses the lumen method: the lumens needed equal the target lux multiplied by the floor area in square metres, divided by a utilisation factor (how much of the light reaches the working surface, often about 0.5–0.7 in small, light-coloured rooms) and a maintenance factor (allowing for dust and ageing, often about 0.8). Combining the two, dividing by roughly 0.45–0.55 is a reasonable rule for a typical Indian room with light walls.
Worked example: the 3.3 × 3.6 m master bedroom
The master bedroom in the plan is 3.3 × 3.6 m, or about 11.9 m². For a general level of 100 lux, the room needs about 100 × 11.9 ÷ 0.5 ≈ 2,400 lumens of ambient light. Good LED fittings for homes typically deliver somewhere around 80–110 lumens per watt (the exact figure is printed on the box and datasheet), so that is roughly 22–30 watts of LED in total. In practice it might be split as 30 running feet of warm cove strip — which, after bouncing off the ceiling, contributes perhaps 1,200–1,800 useful lumens — plus two dimmable 9–12 watt panels — which also gives a brighter option for cleaning and packing. Two bedside reading lights then carry the task layer separately.
Worked example: the 5.4 × 5.2 m living room
At about 28 m² and a general level of 150 lux, the living room needs about 150 × 28 ÷ 0.5 ≈ 8,400 lumens with everything on — roughly 75–105 watts of LED. That is split across a cove on two or three sides, six downlights on a 1200–1500 mm grid over the seating and circulation, and two or three accent spots on the TV wall or art. Because the layers are switched separately, the evening setting might be cove plus one lamp — perhaps a third of the total — while the full setting is used for cleaning, guests and festivals.
| Room (plan size) | Area (m²) | Target lux | Approx. lumens (÷ 0.5) | Suggested fittings |
|---|---|---|---|---|
| Living (5.4 × 5.2 m) | 28 | 150 general | ≈ 8,400 | Cove 2–3 sides, 6 downlights, 2–3 accent spots, 1 floor-lamp socket |
| Dining (3.3 × 4.0 m) | 13 | 200 at table | ≈ 5,200 | 1 large pendant or 3-pendant cluster, cove or 2 downlights |
| Kitchen (2.7 × 4.0 m) | 11 | 500 at counter | Strip of ≈ 600–1,000 lm per metre of counter | Under-cabinet strip full length, 3–4 panels or downlights |
| Master bedroom (3.3 × 3.6 m) | 12 | 100 general | ≈ 2,400 | Cove, 2 panels, 2 bedside lights, wardrobe sensor strip |
| Bedroom 2 (3.0 × 3.6 m) | 11 | 100 general | ≈ 2,200 | Cove or 2 panels, 1–2 bedside lights |
| Bedroom 3 with study (3.3 × 3.6 m) | 12 | 100 + 400 at desk | ≈ 2,400 + task lamp | 2 panels, bedside light, 4000 K desk lamp |
| Bathrooms (approx. 1.5–2.1 × 2.4 m) | 4–5 each | 150 + mirror | ≈ 1,200–1,500 | 1 IP-rated ceiling light, 2 vertical mirror strips |
| Foyer (2.1 × 1.2 m) | 2.5 | 200 | ≈ 1,000 | 2 downlights, 1 accent on art or shoe-unit niche |
| Passage (7.8 × 1.2 m) | 9 | 100 | ≈ 1,900 | 3–4 downlights on a single switch, two-way at ends |
Room by room: public, working and private spaces
Foyer
The foyer is where the eye arrives from bright daylight or a lit corridor, so it should be one of the brighter spaces in the flat — around 150–200 lux — and then step down as one moves inside. Two downlights and one accent light on a piece of art, a jaali or the shoe-unit niche are usually enough. A switch just inside the door, at the latch side, at the standard 1100–1200 mm height, should control the foyer light so nobody walks into a dark flat.
Living room
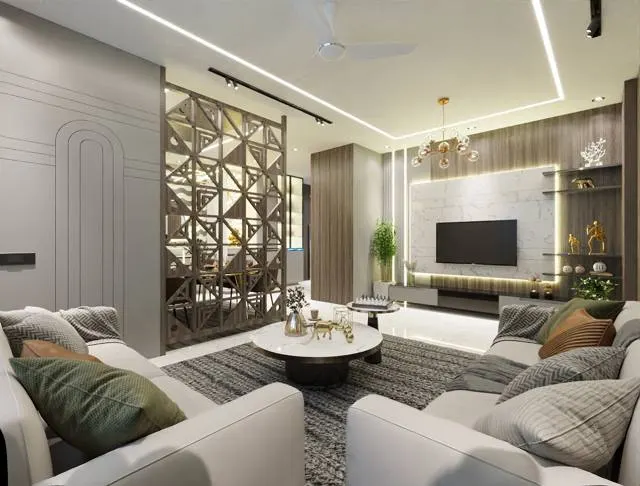
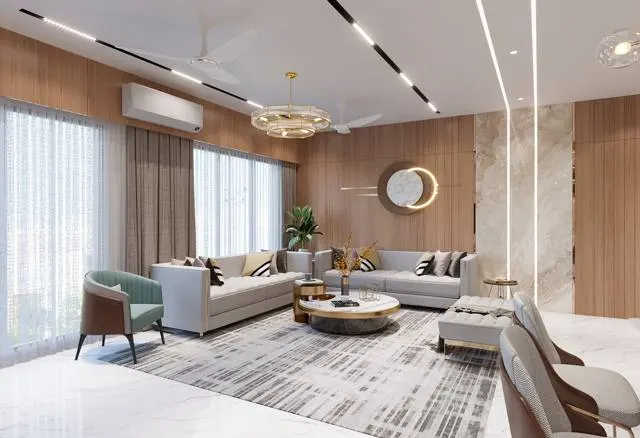
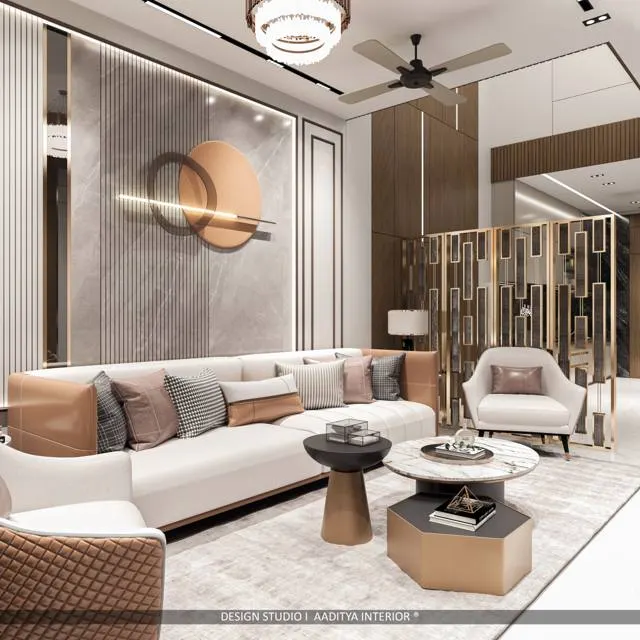
The living room is where layering matters most. The ambient layer is a cove on two or three sides at 2700–3000 K, which washes the ceiling and makes the room feel taller. Downlights on a 1200–1500 mm grid over the seating and the walkway give a brighter general layer. Accent spots — narrow beams of 24–36 degrees — light the TV wall texture, a painting or a plant. A reading lamp beside the main sofa provides the 300–500 lux needed for a newspaper. Avoid a downlight directly above the TV screen, which reflects in the glass, and avoid downlights directly over seated heads, which cast shadows under the eyes.
Dining
The dining table should be the brightest point of the dining area, at about 200 lux. A single large pendant or a cluster of three, centred on the table, does this best. Commonly cited practice hangs the bottom of a dining pendant about 750–900 mm above the table top, low enough to light the food and keep the bulb out of the eyes, high enough to see across the table. The pendant point must be marked from the final table position before the ceiling is closed; a pendant 300 mm off the table centre looks wrong for good.
Passage
A passage needs about 100 lux and one layer. Three or four downlights on a single circuit, with two-way switching at each end so the light can be turned off from either side, are enough. A cove in a passage is usually money that would be better spent in the living room. Low-level step or skirting lights on a motion sensor make a useful night path to the bathrooms, especially in a home with elders.
Kitchen, utility and bathrooms
The kitchen is where ceiling-only lighting fails most visibly. The cook stands with their back to the ceiling light and works in their own shadow. The fix is an LED strip under the wall cabinets, set towards the front edge of the cabinet base and shielded with a profile or a pelmet, at 4000 K so that vegetables, oil and spice colours look true. IS 3646-1 recommends 500 lux at food preparation surfaces, which in practice means a continuous strip along the full counter run, not a few puck lights. Ceiling panels or downlights at 3500–4000 K then provide the general layer, on a separate switch. Kitchen fittings should have a colour rendering index (CRI) of at least 80, preferably 90.
In bathrooms, the general light should be an IP-rated fitting suitable for damp locations, and the mirror should be lit from the sides at face height — vertical strips or sconces flanking the mirror — at about 4000 K. A single light above the mirror throws shadows under the brow, nose and chin. The utility area needs one bright batten or panel at 4000 K over the washing machine and drying zone, and the balcony needs a weatherproof fitting, preferably warm white.
Three bedrooms and a study corner
Bedrooms should be lit for the evening first. The ambient layer is low and warm — a cove or two dimmable panels at 2700–3000 K giving roughly 50–150 lux. The task layer is a reading light on each side of the bed, with the shade or lens at roughly seated eye level in bed, which is about 1000–1200 mm above the floor for a mattress top of 550–650 mm. A wall light with a directional head, or a pendant hung beside the bedside table, frees the table top. The wardrobe gets a sensor-operated strip inside, so it lights when opened and needs no switch.
Switching is what makes a bedroom comfortable. The room light should be controlled from the door and from the bed with two-way switches; the reading lights should be switched individually at each bedside, so one person can read while the other sleeps. In the third bedroom, which in many families doubles as a study or work-from-home room, the desk needs a 4000 K task lamp providing 300–500 lux on the work surface, placed on the side opposite the writing hand so that the hand does not shadow the page. The table below gathers the heights that should be marked on the electrical drawing before the walls are chased.
| Item | Typical height above finished floor | Notes |
|---|---|---|
| Main switch plate at room door | 1100–1200 mm | On the latch side, 150–200 mm from the door frame |
| Bedside switch plate | 700–900 mm | Just above a 550–650 mm side table |
| General power sockets | 300–450 mm | Above skirting; behind furniture where the plan shows a lamp or TV |
| Kitchen counter sockets | 1000–1100 mm (≈ 150–200 above counter) | Clear of the backsplash joint; away from the sink and hob |
| TV wall sockets | Behind the screen centre or above the console | Conceal cables in conduit; one data point too |
| Bedside wall light | 1000–1200 mm (shade centre) | Roughly seated eye level in bed |
| Bathroom mirror side lights | Centred about 1500–1650 mm | Face height for most adults; IP-rated near water |
| Dining pendant (bottom) | 750–900 mm above table top | Commonly cited practice |
| Passage night lights | 200–400 mm | Low-level, on a motion sensor |
Colour temperature, colour rendering and glare
Colour temperature, measured in kelvin, describes how warm or cool white light appears. Warm white at 2700–3000 K resembles incandescent and lamp light and suits living rooms, dining and bedrooms in the evening. Neutral white at 3500–4000 K suits kitchens, bathroom mirrors, studies and utilities, where colour accuracy and alertness matter. Cool white at 5700–6500 K, still common in Indian homes because it looks bright in the shop, makes living spaces feel clinical and should generally be kept out of living and sleeping rooms. The single most common mistake is mixing temperatures in one room — a 3000 K cove with 6500 K panels — which makes both look wrong.
Colour rendering index (CRI) describes how faithfully a light shows colours, on a scale up to 100. For homes, a CRI of 80 or above is the minimum; 90 or above is worth paying for in kitchens, dressing areas and anywhere art or skin tones matter. Glare is the third factor. Deep-recessed or anti-glare downlights, where the LED sits well back from the ceiling face, are much more comfortable than flat surface panels at eye-catching brightness. In a room where people lie down or recline — bedrooms and living rooms — this is the difference between a calm ceiling and a ceiling full of bright dots.
| Fitting type | Typical use | Beam / character | Indicative cost (October 2026) |
|---|---|---|---|
| Cove LED strip in profile | Ambient wash in living, dining, bedrooms | Soft, indirect, glare-free | ₹150–300 per running ft installed |
| LED panel / downlight | General and task light | 60–90° wide beam; choose anti-glare | ₹400–1,200 per piece |
| Accent spot (adjustable) | Art, TV wall texture, plants | 24–36° narrow beam | ₹400–1,200 per piece |
| Under-cabinet strip (kitchen) | Counter task light at 500 lux | 4000 K, CRI 90 preferred | ₹150–300 per running ft installed |
| Designer pendant | Dining table, bedside, double height | Feature and local task | ₹2,000–15,000 per piece |
| Mirror side strips / sconces | Bathroom grooming | 4000 K, face lit from both sides | ₹150–300 per running ft or ₹400–1,200 per fitting |
| Sensor strip (wardrobe, passage) | Automatic on/off | Low output, motion or door sensor | Strip rate plus sensor: verify locally |
Circuits, switching and controls
A lighting plan is only as good as its switching. Each layer in each main room should be on its own switch, so the family can choose the mood. Dimmers on the living room cove, the dining pendant and the bedroom coves are among the cheapest luxuries in interiors. The dimmer must match the LED driver — not every driver is dimmable, and a mismatched dimmer causes flicker or hum — so the electrician should be told which circuits are to be dimmed before drivers are purchased. Drivers for cove strips should be placed where they can be reached for replacement, typically through a small access panel in the false ceiling.
For a 3BHK, a sensible circuit plan separates lighting from power, groups lights by zone so that a single fault does not darken the whole flat, and keeps outdoor and balcony lights on their own circuit. The National Building Code of India 2016, Part 8 (Building Services), Section 2, and IS 732 cover electrical wiring practice; a licensed electrician should design the distribution board, the circuit loading and the protective devices such as MCBs and RCCBs. The designer's job is to tell the electrician what is on which switch.
Smart controls: worth it, in the right places
Smart switches, app-controlled drivers and voice assistants are increasingly common in Indian flats. They are useful for scenes — one button for 'movie', 'dinner' or 'night' — and for elders who find a bank of switches confusing. They are less useful when they replace a simple, clearly labelled switch plate entirely, because everybody in the house, including guests and domestic staff, must be able to turn the lights on. A good compromise is conventional switching everywhere, with smart dimming or scenes on the living, dining and master bedroom circuits only. Whatever is chosen, it should be decided before the walls are chased, since retrofitting neutral wires or extra conductors is messy.
The budget: fixture schedule and indicative cost
Lighting hardware for a 3BHK is a real line item and should appear separately in the quotation from the start. The schedule below totals the plan in Fig. 1 using the same indicative October 2026 rates used across this site. It covers the fittings and strips only — wiring, switches and switch plates, false ceiling and electrical labour are separate and vary widely by city and brand, so they should be itemised by the electrical contractor.
| Item | Quantity for the plan | Indicative rate | Indicative total |
|---|---|---|---|
| Cove LED strip (living, dining, three bedrooms) | ≈ 120–160 running ft | ₹150–300 per running ft | ₹18,000–48,000 |
| Panels / downlights | ≈ 25–30 pieces | ₹400–1,200 per piece | ₹10,000–36,000 |
| Accent spots (TV wall, art, foyer) | ≈ 4–6 pieces | ₹400–1,200 per piece | ₹1,600–7,200 |
| Kitchen under-cabinet strip | ≈ 16–20 running ft | ₹150–300 per running ft | ₹2,400–6,000 |
| Bathroom mirror strips (three baths) | ≈ 18–24 running ft | ₹150–300 per running ft | ₹2,700–7,200 |
| Pendants (dining + bedside pair) | 3–5 pieces | ₹2,000–15,000 per piece | ₹6,000–75,000 |
| Wardrobe and passage sensor strips | 4–6 runs | Strip rate plus sensor | Verify locally |
| Total lighting hardware (excluding wiring and ceiling) | ≈ ₹45,000–1,65,000 (wide range set mostly by pendants) |
The spread is wide because pendants and decorative fittings vary so much; the functional backbone — coves, panels and strips — is a much narrower ₹35,000–1,00,000 or so. That backbone is where the money should go first. A family on a tight budget can start with good, warm, anti-glare panels and properly switched circuits, leave pendant points capped in the ceiling, and add decorative fittings later without opening anything up.
Where home lighting is heading
Three changes are already visible in Indian projects. The first is tunable white: fittings whose colour temperature can be shifted from about 2700 K to 5000 K or more, so a room can be crisp in the morning and warm at night. The second is integrated controls — sensors, scenes and schedules — moving from luxury villas into ordinary apartments as prices fall. The third is a stronger focus on efficiency and glare from energy codes and green rating systems such as IGBC and GRIHA, which reward daylight, efficient fittings and controls. The fundamentals will not change: decide the light level, light the task, keep the layers separate, and keep glare out of the eyes.
| Era | Typical home lighting | What it got right | What it got wrong |
|---|---|---|---|
| Until the 1990s | One incandescent bulb or tube light per room | Simple, cheap to install | Flat, glaring, high energy use |
| 1990s–2000s | CFLs, more tube lights, early false ceilings | Lower energy bills | Still one-point lighting; cool colour |
| 2010s | LED panels in a grid, cove strips spread | Efficient, compact, many sources | Over-lit grids, mixed colour temperatures |
| 2020s | Layered LED with dimmers and some smart control | Room-by-room moods | Glare from cheap fittings; driver failures |
| Next decade | Tunable white, sensors, scenes as standard | Light that follows the day | Complexity — must stay easy for everyone to use |
Ten rules for a 3BHK lighting plan
- Set a lux target for every room before placing a single fitting: about 100–300 living, 200 dining, 500 kitchen counter, 100 passage.
- Give every main room at least two layers on separate switches; put coves and pendants on dimmers.
- Light tasks where they happen: under-cabinet strips in the kitchen, side lights at mirrors, reading lights at beds.
- Use 2700–3000 K in living and sleeping spaces and 4000 K for kitchens, mirrors and desks — never mix temperatures in one layer.
- Choose CRI 80 or above everywhere and 90 or above in kitchens and dressing areas.
- Space downlights 1200–1500 mm apart, the first at half the spacing from the wall; never above the TV screen or a pillow.
- Mark switch plates at 1100–1200 mm at doors and 700–900 mm at bedsides, with two-way switching in bedrooms and passages.
- Fix the dining table and bed positions before marking pendant and reading-light points.
- Keep cove strips at least 150 mm below the ceiling face and keep drivers accessible.
- Put lighting hardware in the quotation as its own line from day one.
Frequently asked questions
How many lights are needed in a 3BHK flat?
For a typical 1,200–1,300 sq ft 3BHK with layered lighting, about 25–35 individual fittings (panels, downlights, spots, wall lights and pendants) plus 120–160 running feet of cove strip and 30–45 running feet of task strips in the kitchen and bathrooms. The exact number should come from the lux target of each room, not from filling a ceiling grid.
Which colour light is best for a living room — warm white or cool white?
Warm white, around 2700–3000 K, is the usual choice for living rooms and bedrooms because it is relaxing and flatters skin and materials. A neutral 4000 K is better for kitchens, bathroom mirrors and study desks. Cool daylight at 6500 K is best kept out of living spaces.
How many lux does a living room need?
Commonly cited guidance puts a residential living room at about 100–300 lux for general light, with a reading spot of 300–500 lux. Design the general layer to the lower end and use dimmers, then add task and accent light where it is needed.
What is the right height for switch boards in a house?
Common Indian practice places switch plates at about 1100–1200 mm above the finished floor at doors, bedside switches at about 700–900 mm, and general sockets at 300–450 mm. Kitchen counter sockets sit about 150–200 mm above the counter.
Is a cove light enough to light a room?
Usually not on its own. A cove gives soft, indirect background light, which is ideal for evenings, but it rarely reaches the light levels needed for reading, cooking or cleaning. Combine it with panels or downlights on a separate switch, and add task lights where needed.
Sources & standards
- Bureau of Indian Standards — IS 3646 (Part 1):1992, Code of practice for interior illumination: general requirements and recommendations for working interiors
- National Building Code of India 2016, Part 8 (Building Services), Section 1 (Lighting and Natural Ventilation) and Section 2 (Electrical and Allied Installations)
- Bureau of Indian Standards — IS 732:2019, Code of practice for electrical wiring installations
- CIBSE / Society of Light and Lighting — Code for Lighting (recommended illuminance for residential spaces)
- Bureau of Energy Efficiency — Standards and Labelling programme; Energy Efficiency Services Limited (EESL) — UJALA LED programme, launched 2015
- IGBC and GRIHA green building rating systems — lighting efficiency and daylight credits
- Price ranges: indicative October 2026 estimates — confirm locally before budgeting