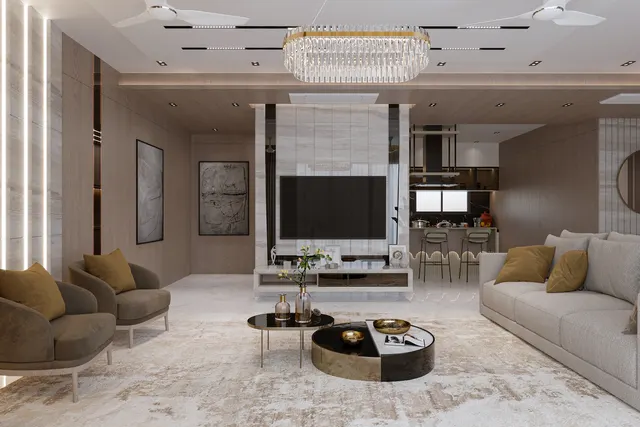
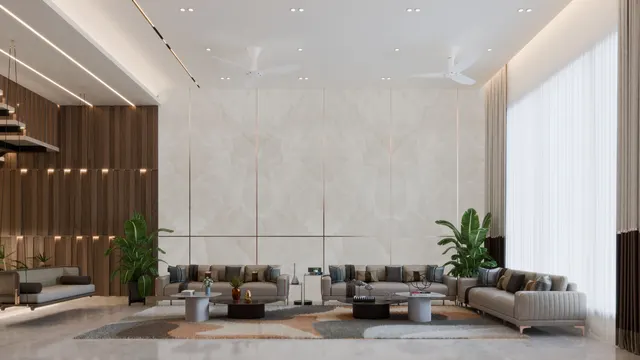
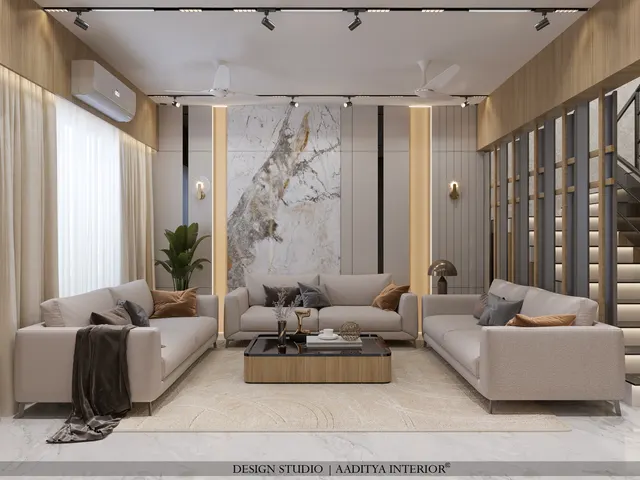
A thin line of light running across a ceiling, down a wall or along the edge of a wardrobe has become the signature of the contemporary Indian interior. It appears in living rooms in place of a grid of downlights, in kitchens under cabinets, in bedrooms behind the headboard, in offices as long suspended lines over desks, and on staircases tracing every step. Clients ask for it by many names — profile light, linear light, strip line, line light, trimless light — and installers sell it at prices ranging from a few hundred rupees a foot to several thousand.
The difference between a line that looks crisp for ten years and one that looks cheap within months lies in details most people never see: the depth of the aluminium channel, the type of diffuser, whether the strip is COB or SMD, how many watts it carries per metre, where the driver sits, how the run is fed, and how the profile meets the ceiling board. Get these wrong and the line shows dots, dark patches at the ends, colour shift between runs, cracks where gypsum meets metal, or flicker when dimmed.
This guide goes deeper than this site's LED strip article, which explains the strip itself. It covers profile lights as complete luminaires: the six main profile types and their dimensions, how recessed and trimless profiles are built into gypsum ceilings, how to choose output, colour temperature and colour rendering, how to plan lines in a room and power them reliably, design ideas room by room, and what each type costs in October 2026. Prices are kept consistent with the lighting guides already on this site.
From tube lights to trimless lines: a short history
Linear light is older than LEDs. The fluorescent tube, which became common in the mid-twentieth century, was the first light source shaped like a line, and architects soon hid tubes behind ledges, pelmets and ceiling coves to wash walls and ceilings with indirect light. In Indian homes the tube light was usually exposed — a white batten on the wall of every room — but by the 1990s and 2000s gypsum and POP false ceilings with hidden tube or T5 coves had become the standard upgrade in middle-class flats and offices. The cove produced a soft glow, but the tubes were bulky, needed space for their holders and starters, and could not make a sharp, continuous line.
The flexible LED strip changed that in the 2010s. Thin, cheap and able to run for metres without a gap, strips moved into coves first and then into aluminium extrusions, which gave them a heat sink, a diffuser and a precise shape. Once the strip sat inside a profile, the line itself could be shown rather than hidden: recessed into the ceiling, cut into walls, suspended over tables. Plaster-in or trimless profiles, which disappear into the ceiling so only a slot of light remains, and low-voltage magnetic track systems, which clip linear modules and spots onto the same rail, followed in the late 2010s and 2020s. Today the question is not whether to use linear light but which kind, where, and how well it is detailed.
| Period | Typical linear light | What it made possible | Limitation |
|---|---|---|---|
| Mid-1900s onward | Exposed fluorescent tube battens | Even, efficient general light | Glare, flicker, flat appearance |
| 1990s–2000s | Tube or T5 lamps hidden in gypsum coves | Indirect glow on ceilings | Bulky, gaps between lamps, no visible line |
| 2010s | LED strips in coves and simple profiles | Continuous lines, low heat, cheap | Dots, poor drivers, colour mismatch between batches |
| Late 2010s | Recessed and trimless aluminium profiles | Crisp lines cut into ceilings and walls | Needs precise ceiling work and planning |
| 2020s | Magnetic track linear modules, tunable white, smart control | Lines and spots on one rail; scenes and colour change | Higher cost; system lock-in to one brand |
Anatomy of a profile light
A profile light has five parts, and each one can fail. The aluminium channel (the profile) holds the strip, spreads its heat and sets the shape of the line. The LED strip is the light source; COB strips give a continuous line without visible chips, while SMD strips have discrete chips that need distance or a dense diffuser to hide. The diffuser is the plastic cover — usually polycarbonate or PMMA, in opal, frosted or clear finishes — that turns points of light into a smooth glow. End caps and mounting clips close and fix the profile. And the driver, a power supply usually at 24 V DC for interior strips, converts mains power and must be sized, ventilated and reachable.
The most important dimension is the distance between the LED chips and the diffuser. A shallow profile, with the strip only 5–8 mm below the diffuser, shows the chips of an SMD strip as a row of dots; the same strip in a deep profile, 15–25 mm below an opal diffuser, gives a smooth line. A COB strip looks dotless even in a shallow profile, which is why COB has become the default for visible lines. Fig. 1 shows the section of a recessed profile in a gypsum ceiling, with the dimensions that matter.
Six types of profile light
Profile lights come in six families, defined by how they are mounted and where they throw light. The right choice depends on the surface (gypsum ceiling, plaster wall, cabinet, glass, RCC slab), on whether the line itself should be seen, and on the job — general light, task light, accent or decoration. Fig. 2 shows the sections side by side at one scale, and the table that follows compares them.
| Type | Mounting | Typical visible width | Best for | Watch out for |
|---|---|---|---|---|
| A · Surface profile | Screwed or clipped onto a finished surface | 16–25 mm | Under kitchen cabinets, inside wardrobes, shelves, mirrors | Visible body; dust on top; needs a neat cable entry |
| B · Recessed with trim | Set into a cut slot; a thin lip covers the cut | 16–35 mm slot plus 5–10 mm trim each side | Ceiling lines, wall lines, furniture faces | Trim edge shows if the cut is wavy |
| C · Trimless (plaster-in) | Flange fixed to framing and finished over with joint compound | 20–75 mm slot only | Premium ceilings and walls where the line should look carved | Must be fixed before the ceiling is finished; precise workmanship needed |
| D · Corner 45° | In the internal corner of a cabinet, niche or wall | 16–20 mm each leg | Display niches, wardrobe corners, under-shelf edges | Shows the strip if the diffuser is shallow |
| E · Suspended | Hung on wires from the slab or ceiling | 35–75 mm | Over dining tables, kitchen islands, office desks | Ceiling canopy and cable drop must be planned |
| F · Wall-washer / asymmetric | Recessed or surface near a wall, light thrown sideways | 20–50 mm | TV walls, stone or textured feature walls, wardrobes | Distance from wall decides evenness; mock up first |
| Magnetic track (system) | Low-voltage rail recessed or surface; modules clip in | Rail 20–35 mm | Living rooms and retail where lines and spots mix | System prices; modules locked to one manufacturer |
Choosing output, colour and protection
Strips and profile modules are specified by a small set of numbers printed on their data sheets. Lumens per metre tells how much light a line gives; watts per metre tells how much power it draws and how much heat the profile must shed; colour temperature tells how warm or cool the white looks; the colour rendering index (CRI or Ra) tells how naturally colours appear; and the IP rating, under the IEC 60529 system, tells how well the luminaire is protected against dust and water. Asking for these numbers in writing is the simplest way to compare two quotes for 'profile light'.
| Application | Typical output | Colour temperature | CRI | Protection |
|---|---|---|---|---|
| Decorative ceiling or wall line | About 400–800 lm per metre | 2700–3000 K | ≥ 90 preferred | IP20 indoors |
| Ambient line replacing downlights (living, bedroom) | About 800–1,500 lm per metre | 2700–3000 K (bedroom), 3000 K (living) | ≥ 90 | IP20 |
| Kitchen under-cabinet task | About 600–1,000 lm per metre | 4000 K (or 3500 K) | ≥ 90 for food colour | IP20; IP44 near the sink is safer |
| Wardrobe and display | About 400–800 lm per metre | 3000–4000 K | ≥ 90 for fabrics | IP20; door or motion sensor |
| Bathroom mirror and wet zones | About 600–1,000 lm per metre | 3000–4000 K | ≥ 90 for skin tones | IP44 or higher; IP65 within splash reach |
| Office suspended linear | Sized to give about 500 lux at desks | 3500–4000 K | ≥ 80, 90 for design studios | IP20; low-glare optic |
| Staircase and skirting | About 200–500 lm per metre | 2700–3000 K | ≥ 80 | IP20 inside; IP65 outdoors |
Two specifications are often missed. The first is colour consistency: lines from different production batches can look slightly pink or green beside each other. Better manufacturers bin their LEDs and state colour consistency in MacAdam steps (SDCM); a figure of 3 or less is commonly specified for visible lines, and all strips for one room should be ordered from one batch. The second is heat: a high-output strip of 15–20 W per metre in a small surface profile runs hot, which shortens its life and can shift its colour. Higher outputs need larger aluminium profiles, and no strip should be sealed inside a profile without air or a metal path for heat. Output targets should follow the lux levels in this site's lux guide: about 100–300 lux for living rooms, 50–150 lux for bedrooms and 500 lux on kitchen counters and office desks.
Planning linear layouts room by room
Linear light works best when it follows the architecture rather than fighting it. Lines that run parallel to walls, line up with furniture, door frames and beams, and stop at a deliberate point look designed; lines that cross a ceiling diagonally for no reason, or stop a few centimetres short of a wall, look accidental. Every layout should be drawn on a reflected ceiling plan — the ceiling drawn as if seen in a mirror on the floor — together with the furniture below, before any ceiling framing starts. Fig. 3 shows a living room planned this way.
Living rooms
In living rooms, linear light is most useful in three roles. A wall-washer or grazing line 300–600 mm from the TV wall or a stone feature wall lights the wall evenly and makes the room feel larger. A frame of recessed lines over the seating area replaces a grid of downlights with a calmer, more architectural ambient light. And a suspended line or pendant over a coffee table or reading corner adds a focal point. Keep these on separate switches or dimmer channels so that the room can move from bright evening light to a soft television setting. Lines placed directly above the sofa back, where seated people look up into them, should use a deep, low-glare diffuser.
Bedrooms
Bedrooms need less light and less glare. The most comfortable linear applications are a concealed line behind or above the headboard panel, washing the wall; a cove or recessed line around the ceiling perimeter on a dimmer; and sensor-operated lines inside wardrobes. Avoid a bright line running across the ceiling directly over the bed, which is the first thing seen when lying down. Warm white of 2700–3000 K and a dimmable driver are the standard.
Kitchens and dining
The kitchen is where linear light earns its keep. A surface or recessed profile fixed to the front underside of wall cabinets puts task light on the counter without shadows from the person working; this site's kitchen lighting guide sets the target at about 500 lux on the counter with 4000 K light and CRI 90. Over an island or a dining table, a suspended linear luminaire hung with its bottom about 700–860 mm above the top lights the whole length of a rectangular table in a way that a single round pendant cannot. Inside tall units, door-triggered sensor lines help.
Offices, stairs and other spaces
In offices, suspended or recessed linear luminaires in continuous rows give uniform light over long desks and suit the 500 lux target used for desk work; low-glare optics with a unified glare rating of about 19 or lower are commonly specified where screens are used. On staircases, a recessed line in the wall at about 300 mm above the tread nosing, or a line under the handrail, lights the steps without glare. Skirting lines make a narrow corridor feel wider at night and work as gentle night lights on a sensor. In retail, magnetic track systems that mix linear modules and adjustable spots on one rail allow displays to change without new wiring.
| Idea | Profile type | Position | Tip |
|---|---|---|---|
| TV wall or stone wall grazing | Wall-washer or deep recessed | 300–600 mm from the wall in the ceiling | Mock up on site before cutting — texture shows more as the line moves closer |
| Ceiling frame over seating | Recessed or trimless | 600–900 mm in from walls, aligned with furniture | Ends meet at mitred corners, not butt joints |
| Headboard glow | Surface or corner, hidden | Behind a headboard panel, 50–100 mm from the wall | Dimmer; 2700 K |
| Under-cabinet task line | Surface, slim | Front underside of wall units | Angle or front-mount so the light falls on the counter, not the backsplash only |
| Dining or island linear | Suspended | Bottom 700–860 mm above the top | Length about two-thirds of the table length |
| Wardrobe and niches | Corner or surface | Front top edge inside the carcass | Door or motion sensor; 3000–4000 K |
| Staircase wall line | Recessed | About 300 mm above tread nosing, parallel to the stair | Low output; avoid glare in the eyes of people going down |
| Skirting night line | Recessed or surface | In or just above the skirting | Motion sensor, very low output |
Power, drivers and dimming
Most profile-light failures are electrical, not optical. LED strips run on low-voltage DC, usually 24 V for interior lines, from a driver (an SMPS or LED power supply). As current flows along a strip, the copper tracks lose voltage, so the far end of a long run gets dimmer and may shift in colour. The simple rule — repeated from this site's LED strip guide — is to size the driver at about 1.25 times the connected load and to feed runs longer than about 5 m from both ends, or from the middle. Higher-power strips drop voltage faster and may need feeds more often; the manufacturer's maximum run length should always be checked.
Drivers need a home. They should sit in the ceiling void or a cabinet where air can move around them, never sealed inside gypsum or wrapped in insulation, and always within reach of an access panel or removable section — a driver is the component most likely to need replacing in the life of the installation. Label each driver with the circuit it serves. In a typical living room, two or three drivers serving separate lines are better than one large driver feeding everything, because one failure then leaves the room partly lit and the lines can be switched and dimmed independently.
Dimming must be decided before ordering. A wall dimmer that cuts the mains waveform (phase-cut or triac dimming) needs a driver designed for it; a 0–10 V or DALI dimming system needs drivers with those control inputs; and smart systems use their own controllers. Mixing an ordinary driver with a dimmer causes flicker, buzzing or early failure. For homes, a pair of dimmable drivers on the living-room lines and the bedroom headboard line gives most of the benefit at modest cost. Where tunable white is wanted — warm in the evening, neutral by day — the strip, controller and driver must all be part of the same system.
Installation details that prevent cracks and shadows
In gypsum ceilings, the junction between metal profile and board is where problems appear. A recessed profile should be fixed to the ceiling framing with screws or the manufacturer's clips, not held only by the board or by adhesive. Trimless profiles need their flanges screwed and then covered with paper or mesh joint tape and two or three coats of joint compound, exactly like a board joint; skipping the tape is the main cause of the hairline crack that appears along the line a few months later. The cut in the board must be straight — a wavy cut shows as a wavy line once lit — so the slot should be marked with a chalk line or laser and cut with a guided tool.
Corners and ends need planning. Profiles meet at corners with factory corner pieces or mitred joints; strips at a corner are either bent with the manufacturer's method or joined with a short soldered or clip connector. The last 20–50 mm of a run is often dark because the strip has a solder pad or end cap; a well-detailed line hides this behind the end cap or runs the strip right into the corner. Painting comes last: protect diffusers with tape during painting and fit them after the final coat, because paint spatter on an opal diffuser cannot be removed. Finally, switch on every line before the access panels are closed and check for dark patches, colour differences and flicker at low dimming levels.
What profile lighting costs
Profile-light quotes vary widely because the word covers everything from a strip stuck into a cheap channel to a trimless system with branded LEDs. The table below gives indicative October 2026 installed rates per running foot in Indian cities, consistent with this site's lighting guides, where a cove LED strip with profile and driver is typically ₹150–300 per running foot installed. The higher bands reflect larger profiles, branded high-CRI strips, dimmable drivers and the extra ceiling work of recessed and trimless details. Always ask what is included: profile size and brand, strip type and W per metre, CRI, driver brand and rating, and whether ceiling cutting and finishing are part of the rate.
| Type | Indicative installed cost (October 2026) | Includes | Example |
|---|---|---|---|
| Cove strip in simple profile | ₹150–300 per running ft | Strip, channel, diffuser, driver share, labour | Bedroom cove, 40 ft ≈ ₹6,000–12,000 |
| Surface profile (under-cabinet, wardrobe) | ₹200–450 per running ft | Slim profile, COB strip, driver share, sensor extra | Kitchen under-cabinet, 12 ft ≈ ₹2,400–5,400 |
| Recessed profile with trim in gypsum | ₹300–700 per running ft | Profile, COB or high-density strip, opal diffuser, driver share, cutting | Living room lines, 43 ft ≈ ₹12,900–30,100 |
| Trimless plaster-in profile | ₹700–1,500 per running ft | Plaster-in profile, jointing, high-CRI strip, driver share | Same 43 ft trimless ≈ ₹30,100–64,500 |
| Suspended linear luminaire | ₹2,500–10,000 per running metre (indicative, verify locally) | Factory-made luminaire, suspension, canopy | 1.5 m over a dining table ≈ ₹3,750–15,000 |
| Magnetic track system | Track ₹1,000–3,000 per metre plus modules (indicative, verify locally) | Recessed or surface rail, driver, linear and spot modules | Priced per module; get a system quote |
| Dimmable driver upgrade | Add ₹1,500–5,000 per driver (indicative, verify locally) | Phase-cut, 0–10 V or DALI driver instead of standard | Two living-room circuits ≈ ₹3,000–10,000 |
For a typical 3BHK, linear lighting in the living room, master bedroom headboard, kitchen under-cabinets and wardrobes adds roughly 100–180 running feet. At recessed and surface rates that is about ₹30,000–1,00,000 for the lines, before pendants and downlights; trimless detailing throughout can double the figure. Spending on good drivers and accessible panels saves more over ten years than spending on the most expensive profile.
Where linear lighting is heading
Linear lighting is moving in three directions. First, integration: trimless profiles that disappear into plaster, lines built into furniture, skirting and handrails at the factory, and magnetic track systems that let the same rail carry lines, spots and pendants. Second, control: tunable-white strips that shift from warm evening light to neutral daylight, scene control from wall keypads and phones, and sensors that dim lines in empty corridors — encouraged by energy codes such as ECBC and by green-building rating systems such as IGBC and GRIHA. Third, quality: as buyers learn to ask about CRI, colour consistency, flicker and driver quality, the gap between a cheap line and a good one is becoming visible on quotations rather than only on the ceiling.
The design principle will not change. A line of light is a strong graphic element, and too many lines make a ceiling busy. The best linear schemes use few lines, align them with the architecture, layer them with downlights, pendants and lamps, and put each layer on its own control. Light the walls and the tasks first, and let the lines do what lines do best: make the room's geometry legible.
Rules for profile lights and linear lighting
- Draw every line on a reflected ceiling plan with the furniture below before the ceiling framing starts.
- Use COB strips in shallow or visible profiles; use SMD only in deep profiles with an opal diffuser.
- Specify lumens per metre, watts per metre, colour temperature, CRI (90 or above for homes) and colour consistency in writing.
- Match profile size to wattage so the aluminium can shed heat; never seal strips without a heat path.
- Size each driver at about 1.25 times the load and feed runs longer than about 5 m from both ends or the middle.
- Put drivers in ventilated, labelled positions behind access panels.
- Choose drivers to suit the dimmer type — phase-cut, 0–10 V, DALI or smart — before ordering.
- Screw recessed and trimless profiles to the framing and tape and joint plaster-in flanges to prevent cracks.
- Keep lines aligned with walls, furniture and beams, and end them at deliberate points with joints at corners.
- Fit diffusers after painting and test every line, at full and low dimming, before closing the ceiling.
Frequently asked questions
What is a profile light?
A profile light is a linear light made of an LED strip fixed inside an aluminium channel, with a diffuser cover and end caps, powered by a separate low-voltage driver. The profile protects the strip, spreads its heat and gives a clean line of light that can be mounted on, recessed into or suspended from a surface.
What is the difference between profile light and cove light?
A cove light hides the strip in a ledge so that only the glow on the ceiling or wall is seen. A profile light shows the line itself, set into or onto a surface. Both use LED strips and drivers; profile lights need more precise detailing because the light source is visible.
How much does profile light cost per running foot?
At indicative October 2026 rates, a cove strip in a simple profile costs about ₹150–300 per running foot installed, a surface profile about ₹200–450, a recessed profile in a gypsum ceiling about ₹300–700, and a trimless plaster-in profile about ₹700–1,500. Prices depend on profile size, strip quality, driver brand and ceiling work.
Which is better for profile light — COB or SMD strip?
COB strips give a continuous, dotless line even in shallow profiles, which makes them the better choice for any line that is seen directly. SMD strips can match them in deep profiles with an opal diffuser and are often used in hidden coves. In both cases, choose a strip with CRI 90 or above and a stated colour temperature.
Can profile lights be dimmed?
Yes, if the driver is designed for the dimming method used — a phase-cut wall dimmer, a 0–10 V or DALI control system, or a smart controller. An ordinary driver connected to a dimmer usually flickers or fails, so the dimming method should be chosen before the drivers are ordered.
Do profile lights crack gypsum ceilings?
They should not, if they are screwed to the ceiling framing and, for trimless profiles, taped and jointed like a board joint. Cracks along a line usually come from profiles held only by the board or by adhesive, or from flanges finished without joint tape.
Sources & standards
- Bureau of Indian Standards — IS 3646 (Part 1): Code of practice for interior illumination — recommended illuminance for homes and offices
- Bureau of Indian Standards — National Building Code of India 2016, Part 8 (Building Services), Section 1: lighting and natural ventilation; Section 2: electrical installations
- IEC 60529 — Degrees of protection provided by enclosures (IP code)
- Bureau of Energy Efficiency — Energy Conservation Building Code (ECBC): lighting power and controls
- Society of Light and Lighting (CIBSE) — Code for Lighting: residential and office guidance, glare and colour rendering
- LED strip and profile manufacturers' standard data sheets — lumens and watts per metre, maximum run lengths, colour consistency (SDCM) and profile dimensions, described generically
- Price ranges: indicative October 2026 estimates — confirm locally before budgeting