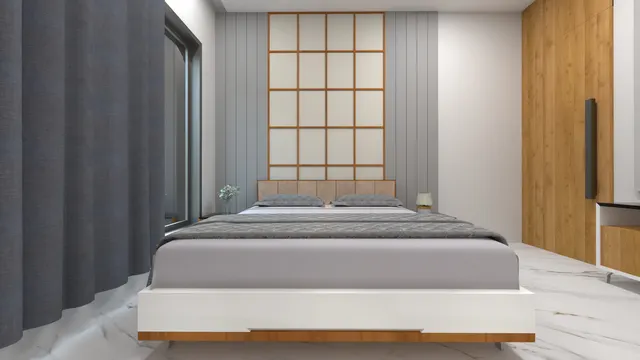



Run a finger along the bottom of any wall and it reaches the skirting — the narrow band of tile, stone, wood or painted board that runs where the wall meets the floor. It is the most overlooked line in an Indian home. Nobody chooses a flat for its skirting, no client asks for it by name, and yet it is the line the eye follows around every room, the edge a mop hits a hundred times a year, and the detail that decides whether a finished room looks resolved or slightly unfinished.
Most skirting problems are small decisions made by default. The carpenter runs an 18 mm wooden skirting in the bedroom, the tiler cuts a 100 mm strip of floor tile for the living room, and the painter paints a thin band near the hall — three heights, three materials, three colours meeting at every door. A random gap appears where the skirting stops short of a cupboard. A water-sensitive wooden skirting is run into a bathroom lobby and swells within a monsoon. A projecting skirting collects dust on its top edge in a city like Surat or Ahmedabad. None of these are expensive to avoid; they are simply never discussed.
This article treats the skirting as the design element it is. It explains what a skirting actually does, where the idea came from, how high it should be in millimetres, which materials suit which room, how the profile and the wall-floor junction should be detailed, what it costs per running foot in October 2026, and where the detail is heading with shadow gaps and slim metal profiles. The aim is that the next floor plan carries one considered skirting decision instead of three accidental ones.
What a skirting actually does
A skirting earns its place by doing three jobs at once. The first is protection: the base of a wall takes the most abuse in the house — mop water, the vacuum cleaner, shoe scuffs, chair legs, the corner of a bed being pushed back. A skirting puts a hard, washable, replaceable band between all of that and the vulnerable wall finish, so scuffs land on the skirting rather than on the paint. The second job is concealment. A floor is never perfectly flat and a plastered wall never perfectly plumb, so the line where they meet is always slightly ragged; tiled floors also need a small expansion gap at the wall. The skirting hides that imperfect junction and the gap behind a clean, deliberate line.
The third job is visual, and it is the one designers care about most. A skirting gives a room a base — a horizontal datum that grounds the walls and makes the proportion read correctly, exactly as a plinth grounds a column. It also closes the composition: without a skirting, the wall finish simply stops at the floor and the eye reads it as an edge that was left unfinished. A good skirting can do more than close the wall: a slim shadow-gap recess makes a wall appear to float; a tall classic skirting adds formality; a skirting that matches the door frame ties the trim of the whole room together.
A short history of the skirting
The skirting board as a distinct timber element is largely a European inheritance. In Georgian and Victorian houses, tall timber skirtings — often 150 to 300 mm high — protected lime-plastered walls from furniture and from the damp that crept up solid masonry, and they paired with a dado rail higher up the wall. Colonial bungalows carried the timber skirting into India, where it sat alongside an older local habit: the plinth band. Traditional Indian homes rarely had a fitted board, but they almost always marked the base of the wall — a raised, waterproof plinth outside, and inside a contrasting border painted or laid around oxide and stone floors, which did the same visual job of grounding the wall.
The modern Indian skirting is mostly a product of tiled floors. Once vitrified and ceramic tiles became the default floor finish, it became natural to cut a matching strip of the same tile and run it up the wall as a skirting — cheap, washable and perfectly colour-matched to the floor. That tile skirting is now the default in most flats. Around it sit the alternatives that this article compares: stone skirtings in premium homes, painted MDF and PVC profiles for a softer line, wood and veneer where warmth is wanted, slim metal profiles in luxury interiors, and — increasingly — the decision to leave the skirting out altogether in favour of a shadow gap.
How high should a skirting be?
There is no legal or code height for a skirting; the right height is a design choice driven by the room's proportion, the floor finish and the look. What matters most is consistency: one height, chosen on purpose, carried through the whole home, so that skirtings line through at every doorway. The common Indian default is 75 to 100 mm (3 to 4 inches), which suits a standard 2.7 m ceiling. A very slim 50 to 75 mm skirting or a flush shadow gap reads as modern and minimal; a tall 100 to 150 mm skirting adds weight and formality and suits higher ceilings and classic interiors. The plate and table below show the bands designers actually use.
| Context | Skirting height | Reads as | Notes |
|---|---|---|---|
| Modern / minimal flat, 2.7 m ceiling | 50–75 mm | Clean, understated | Pairs well with a flush or shadow-gap detail |
| Standard Indian home (default) | 75–100 mm | Balanced, safe | Matches most door frames; easiest to source in tile and stone |
| Classic / formal, 3.0 m+ ceiling | 100–150 mm | Weighty, elegant | Needs a taller door architrave to match |
| Heritage / period look | 150–300 mm | Grand | Usually painted MDF or wood; expensive in stone |
| Wet areas (bathroom, wash) | 75–150 mm | Protective | Tile or coved skirting only; no wood or raw MDF |
| Shadow gap (no board) | 10–20 mm recess | Floating wall | A groove, not a height; needs crisp plaster edges |
Materials for skirting compared
The same 100 mm line behaves very differently in different materials. Tile is cheap, washable and colour-matched to the floor but shows every grout line; stone is handsome and hard-wearing but heavy and costlier; MDF and PVC give a soft painted or laminated line but MDF cannot touch water; wood is warm but needs polishing and stays out of wet areas; metal profiles are slim and modern but priced accordingly. The table below compares the seven options used most in Indian projects. Prices are indicative October 2026 ranges for a finished, installed skirting per running foot, and should be confirmed locally before budgeting.
| Material | Typical thickness | Water tolerance | Indicative installed cost (₹/running ft) | Best used for | Avoid |
|---|---|---|---|---|---|
| Tile skirting (cut from floor tile) | 8–12 mm | Excellent | ₹30–80 | Most rooms; matches a tiled floor exactly | Where a continuous, grout-free line is wanted |
| Granite skirting | 15–18 mm | Excellent | ₹70–160 | Living, stairs, high-traffic and stone floors | Soft, pastel interiors (can look heavy) |
| Marble skirting | 18–20 mm | Good | ₹120–300 | Premium living and marble floors | Kitchens and wet areas (staining) |
| MDF / WPC / polymer (painted or laminated) | 12–18 mm | MDF: poor · WPC/PVC: good | ₹60–180 | Painted modern rooms, curved walls | Raw MDF anywhere near water |
| Solid wood / veneer skirting | 15–20 mm | Poor | ₹150–350 | Warm bedrooms, studies, wood floors | Bathrooms, wash areas, balconies |
| Aluminium / stainless profile | 1.5–3 mm face | Excellent | ₹300–900 | Luxury interiors, flush and LED skirting | Tight budgets; dents from kicks |
| PVC / rubber coved skirting | 2–4 mm | Excellent | ₹60–200 | Bathrooms, kitchens, hospitals, labs | Formal living rooms (utilitarian look) |
Profiles and edge details
Beyond height and material, the profile — the cross-sectional shape of the skirting — changes how a room feels and how easily it cleans. A square-edged skirting is the modern default: crisp and simple, but its flat top edge collects dust in a dusty city. A pencil-round or bullnose top sheds dust and resists chipping. A bevelled or stepped (classic ogee) profile adds detail for period interiors. A shadow-gap detail removes the board altogether, recessing the wall base so the wall appears to float. The sketches below show the common profiles and the one dimension that matters most in each — the projection, because a skirting that stands proud of the wall is the one that gathers dust and catches a toe.
| Profile | Look | Dust / cleaning | Best with |
|---|---|---|---|
| Square edge | Crisp, modern | Top edge gathers dust | Contemporary flats, tile and stone |
| Pencil-round / bullnose | Soft, forgiving | Sheds dust; resists chipping | Family homes, busy corridors |
| Bevel / chamfer | Subtle detail | Good | Transitional interiors |
| Classic ogee / stepped | Formal, decorative | Needs regular dusting | Period and classic rooms |
| Shadow gap (recess) | Floating wall, minimal | Negligible | Luxury minimal, feature walls |
The wall-floor junction: how a skirting is actually built
A skirting is only as good as the junction behind it. On a tiled floor, the floor tiles stop a few millimetres short of the wall to leave an expansion gap, and the skirting is bedded on tile adhesive over a plastered or raw wall and covers that gap. The skirting should sit on the finished floor, not be trapped under it, so it can be replaced without lifting tiles. Where the skirting meets a door frame, it should die cleanly into the architrave rather than running past it. Internal corners are mitred or scribed; external corners are mitred. The detail sketch below shows the layers at a typical junction and the two mistakes that cause most call-backs: no expansion gap, and skirting glued across a movement joint.
Wiring is the other thing a skirting can quietly solve. In renovations where chasing the wall for new cabling is messy, a hollow or stepped skirting — or a slim metal skirting with a cable channel — can carry low-voltage wiring (data, speaker, lamp circuits) around the room at floor level, with removable sections for access. It is not a substitute for a proper wall conduit for mains power, which must follow the usual safe routing and be run by a licensed electrician, but for add-on low-voltage runs it avoids tearing open a finished wall.
What skirting costs
Skirting is priced per running foot of wall, installed. The material is only part of the figure; for tile and stone most of the cost is the cutting and laying labour, because a skirting is a lot of edges and corners for a small area of material. The bands below are indicative October 2026 installed ranges in Indian cities; polishing, special corners, levelling of a bad floor and GST are extra, and metal and LED skirtings are quoted per project. A quick way to budget a room: measure its perimeter in running feet (subtracting door openings) and multiply by the rate for the chosen material.
| Skirting type (installed) | Indicative ₹ / running ft | What drives the cost |
|---|---|---|
| Tile skirting (cut from floor tile) | ₹30–80 | Cutting and laying labour; tile cost is minor |
| Granite skirting | ₹70–160 | Stone grade, polished edge, number of corners |
| Marble skirting | ₹120–300 | Marble variety, edge polishing, wastage |
| MDF / WPC / polymer (painted or laminated) | ₹60–180 | Finish — paint grade or laminate |
| Solid wood / veneer skirting | ₹150–350 | Timber, polishing coats, mitred corners |
| Aluminium / stainless profile | ₹300–900 | Profile section, finish (anodised / PVD) |
| Shadow gap (plaster recess + paint) | ₹80–200 | Extra plaster edge, straightness, painting |
| Aluminium skirting with LED strip | ₹300–600 | Profile plus strip, driver and wiring |
Shadow gaps and the no-skirting look
The clearest trend in modern Indian interiors is the quiet removal of the skirting. Instead of a board, the wall base is finished with a shadow gap — a 10 to 20 mm recessed groove where the wall meets the floor, so the wall appears to float a few millimetres above the ground. It is the sharpest, most minimal detail available, and it collects almost no dust. But it is unforgiving: it needs a dead-straight, plumb wall and a level floor, a proper edge bead or aluminium insert to keep the groove crisp, and it must be set out before plastering, not retrofitted. A wavy plaster line in a shadow gap looks far worse than any skirting. For most homes, a slim flush or pencil-round skirting gives most of the clean look with far less site risk. The future of the detail is less about a new material and more about this choice: how much of a base line a room wants, from a confident 150 mm classic skirting down to no board at all.
Rules for specifying a skirting
- Choose one height for the whole home and carry it through every room so skirtings line through at doorways.
- Match the material to the room: tile, stone, WPC, PVC or metal near water; wood and raw MDF only in dry rooms.
- Decide the profile for cleaning as much as for looks — a rounded or flush top gathers far less dust in Indian cities.
- Keep the projection small; a skirting that stands proud 12–20 mm is the one that catches toes and collects dust.
- Bed the skirting on the finished floor, not under it, so a damaged length can be replaced without lifting tiles.
- Leave the floor's expansion gap at the wall and never run a rigid skirting across a floor movement joint.
- Die the skirting cleanly into each door architrave, and mitre or scribe internal corners rather than butting them.
- Decide shadow-gap and flush details at the shell stage; they depend on straight walls and cannot be added at finishing.
- Tie the skirting to the door frames and the overall trim so the room's lines read as one family.
Frequently asked questions
What is the standard skirting height in India?
Most Indian homes use a skirting of 75 to 100 mm (3 to 4 inches), which suits a 2.7 m ceiling. Slim modern interiors go down to 50–75 mm, and classic or high-ceilinged rooms go up to 100–150 mm. There is no code requirement; the important thing is to use one consistent height throughout the home.
Which skirting is best — tile, wood or PVC?
For most rooms, a tile skirting cut from the floor tile is the best value: cheap, washable and perfectly colour-matched. Wood and veneer suit warm, dry bedrooms and studies but must stay away from water. PVC and WPC coved skirtings are best for bathrooms, kitchens and wash areas. Stone suits premium and high-traffic spaces, and slim metal profiles suit luxury minimal interiors.
Can skirting be avoided completely?
Yes — a shadow gap (a 10–20 mm recessed groove at the wall base) replaces the skirting and gives a floating, minimal look. It works only on straight, plumb walls and level floors, needs a crisp edge bead, and must be planned before plastering. On uneven walls a slim skirting is more forgiving and looks better.
Does skirting go before or after flooring?
The floor goes first, then the skirting is fixed on top of the finished floor so it covers the expansion gap and can later be replaced without disturbing the tiles. The exception is some factory wall panelling systems, where the base trim is part of the panel — in that case the sequence follows the system's instructions.
How do you clean and maintain skirting?
Dust the top edge weekly — it is the part that collects grime — and wipe tile, stone, PVC and metal skirtings with a damp microfibre cloth. Avoid soaking wood or MDF skirtings; wipe them dry. Touch up painted MDF skirtings with the wall or trim paint every couple of years, and re-polish wood skirtings when they look tired.
Sources & standards
- National Building Code of India 2016, Part 6 (Structural Design) and Part 8 (Building Services) — general finishing and electrical routing guidance
- Bureau of Indian Standards — IS 15622 (pressed ceramic tiles), IS 1130 (marble blocks, slabs and tiles), IS 12406 (medium density fibreboard)
- Neufert, Architects' Data — skirting, trims and wall-floor junction detailing
- Time-Saver Standards for Interior Design and Space Planning — base and trim details
- Manufacturer standard ranges for tile, stone, WPC, PVC and aluminium skirting profiles, described generically
- Price ranges: indicative October 2026 estimates for finished, installed skirting — confirm with a local contractor before budgeting