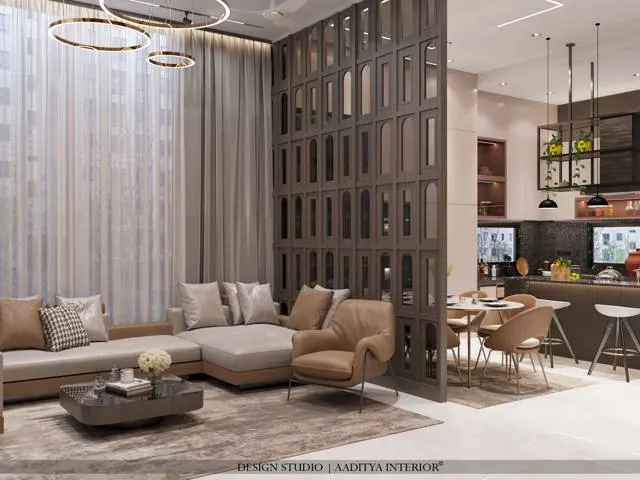
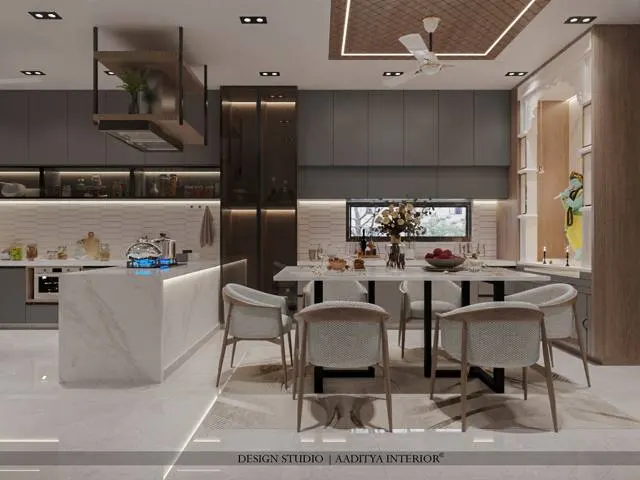
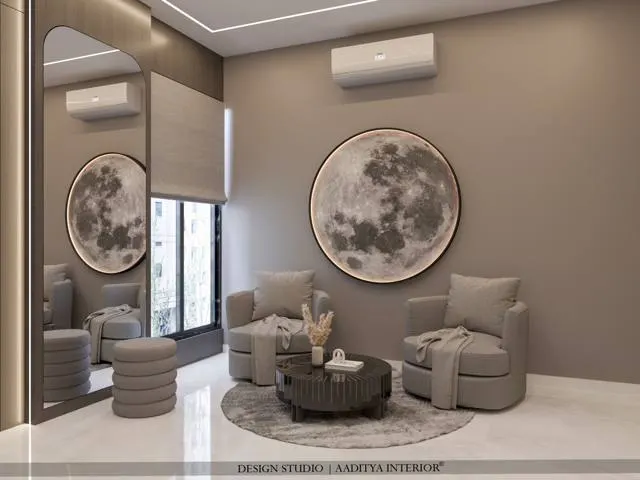
Most homeowners find it hard to read a floor plan. They can see that the living room is 4200 × 5400 mm, but they cannot feel whether the sofa will crowd the TV, whether the kitchen aisle is wide enough for two people, or whether the pooja unit will be seen from the main door. Rendered 3D views helped, but a render is a picture taken from a viewpoint the designer chooses, usually with a wide-angle lens that makes rooms look bigger than they are. The result, on many Indian sites, is the moment when the carpenter installs a wardrobe and the client says, for the first time, "I didn't realise it would be this big".
Virtual reality changes that moment. A VR walkthrough places the client inside a true-scale model of the design. Wearing a headset, they can stand in the doorway, turn their head, walk to the window, sit at the dining table and look up at the false ceiling, at their own eye height. Because the model is at one-to-one scale, a 900 mm passage feels like a 900 mm passage, and a 2400 mm ceiling feels low in a way no drawing conveys. Mistakes that would have cost lakhs of rupees to fix after execution can be corrected with a few clicks.
VR is not magic, and it is easy to overestimate. Colours shift on headset screens, textures cannot be touched, and some people feel unwell after a few minutes. This article explains where VR walkthroughs came from, the different kinds of walkthrough and what each is good for, how a designer builds one, the specific things a client should check while inside, how to set up a comfortable review session, what it costs in 2026, and its limits. It reflects how Aaditya Interior uses 3D and VR reviews with clients in India and abroad, alongside drawings and physical samples rather than instead of them.
From perspective drawings to virtual reality
For most of architectural history, clients understood designs through drawings and models. Hand-drawn perspectives, using techniques formalised in the Renaissance, showed a room from one point of view; physical scale models let clients look into a building from above. Both required skill to produce and imagination to read. Computer-aided drafting arrived in design offices through the 1980s and 1990s, and by the 2000s photo-realistic rendering had become standard: designers built 3D models and rendered still images that took minutes to hours each. Animated walkthrough videos followed, but each change meant rendering again.
Virtual reality has a longer history than most people think. In 1968 the computer scientist Ivan Sutherland demonstrated a head-mounted display that showed simple wireframe graphics responding to the movement of the user's head. Through the following decades, VR was used in research, flight simulation and specialised industry, but headsets were expensive and crude. The modern consumer wave began with the Oculus Rift prototype's crowdfunding campaign in 2012; consumer headsets such as the Rift and the HTC Vive went on sale in 2016, and standalone headsets that need no computer, beginning with the Oculus Quest in 2019, made VR portable. At the same time, game engines and real-time renderers became good enough to show architectural models with realistic light at the frame rates VR needs, and design software began to offer one-click VR export.
Six kinds of walkthrough, and when each is worth it
"Walkthrough" is used loosely for very different things, and the difference matters to cost, time and usefulness. A rendered still image is the cheapest and still the most common way of showing a design. A 360° panorama is a single rendered sphere viewed from one fixed point; on a phone or browser the client can look around by dragging or tilting, and in a headset they can look around in every direction, but they cannot move. An animated walkthrough video moves the camera along a path chosen by the designer. A real-time interactive model lets the client move through the design on a laptop or large screen with a mouse, keyboard or game controller. Full VR places the client inside the model with a headset — tethered to a powerful computer for the highest quality, or standalone for portability. Mixed reality, the newest, overlays digital elements on the real room, so a client can stand in their bare flat and see the planned kitchen in place.
| Type | Can the client move? | Hardware needed | Scale feeling | Best used for |
|---|---|---|---|---|
| Rendered still images | No | Any screen | Weak — wide lenses distort | Mood, materials, colour schemes |
| 360° panorama | Look around only, from fixed points | Phone, browser or headset | Moderate in a headset | Quick room-by-room reviews, sharing on WhatsApp |
| Animated walkthrough video | No — fixed camera path | Any screen | Moderate | Presenting to family members who cannot attend |
| Real-time desktop model | Yes, with mouse or controller | Laptop or PC with a good graphics card | Moderate | Live design meetings and quick changes |
| Full VR (tethered or standalone) | Yes — walk and teleport | VR headset; PC for tethered | Strong — true one-to-one scale | Judging heights, clearances, proportions |
| Mixed reality on site | Yes, in the real room | Mixed-reality headset or tablet | Strongest — real room plus design | Checking fit against the actual site |
For most homes, a combination works best: rendered stills for materials and colour, 360° panoramas shared on the phone for the family to discuss, and one VR session at the studio for the key decisions of scale — the kitchen, the living room, the master bedroom and anything unusual such as a double-height space or a staircase. Commercial projects such as hotels, restaurants, showrooms and offices benefit more from full VR, because circulation, sight lines and brand experience are harder to judge and mistakes are costlier.
How a VR walkthrough is built
A VR walkthrough is only as accurate as the model behind it, so the process begins with good drawings. The designer prepares measured plans, sections and elevations, ideally after the site has been measured — not from the builder's brochure, which often differs from the built flat by several centimetres. A 3D model is built from these drawings with real wall thicknesses, door and window sizes, beams, columns, ceiling heights and furniture at actual dimensions. Materials are assigned — laminate shades, stone, paint colours, fabrics — and the lighting is set up to match the lighting design, both daylight through the actual window orientation and artificial light at the planned fittings.
The model is then brought into a real-time rendering engine, many of which work as plug-ins for common design software, or exported to a dedicated VR viewer. It must be optimised: VR needs every frame rendered twice, once for each eye, at a high and steady frame rate, so very heavy furniture models and textures are simplified. Saved viewpoints are added — the main door, the kitchen, the sofa, the bed — so the client can jump between them. Finally the model is tested in the headset by the designer before the client sees it, checking for missing objects, floating furniture, wrong scale and uncomfortable lighting.
| Stage | Deliverable | Typical time (3BHK) | Common shortcut to refuse |
|---|---|---|---|
| Site measurement | Measured plan with beams, levels, openings | 1–2 days | Modelling from the builder's brochure plan |
| CAD drawings | Plans, sections, elevations in mm | 1–2 weeks | Skipping sections — ceiling heights go wrong |
| 3D modelling | Model with true furniture sizes | 4–8 days | Library furniture at the wrong size |
| Materials and lighting | Finishes and light matching the design | 2–4 days | Generic daylight that ignores orientation |
| VR set-up and test | Optimised model, saved viewpoints | 1–2 days | Sending the model untested |
| Client review | Signed change list and decisions | 60–90 minutes | Reviewing without the drawings at hand |
What to check while inside the model
A VR session is most useful when it has a checklist. Families tend to spend the first minutes admiring the room and the rest of the session discussing colours — which is the one thing VR shows least reliably. The time is better spent on scale and space: heights, widths, distances and what can be seen from where. Before the session, the designer should set the virtual eye height to match the client's own, roughly 1500–1650 mm for most standing adults and about 1100–1200 mm when seated, because a model viewed from the wrong height misjudges every proportion.
| Check in VR | What to compare against | Typical figure used in practice |
|---|---|---|
| Main passage widths | Can two people pass? Can furniture be carried in? | 900 mm minimum; 1050–1200 mm comfortable |
| Kitchen aisle | Stand between counters, open the dishwasher and fridge | 1000 mm for one cook; 1200 mm for two |
| Ceiling and beam heights | Look up under beams and bulkheads | False ceiling commonly 2600–2700 mm in flats |
| TV viewing distance | Sit on the sofa and look at the screen | About 2.1–2.8 m for a 55-inch TV |
| Pendant height | Sit at the table; stand and walk past | 700–860 mm above the dining table |
| Wardrobe and door swings | Open shutters in the model; check clearance | 750–900 mm in front of a hinged wardrobe |
| View from the main door | Stand at the door; what is seen first? | Foyer depth of at least 1200 mm with a screen |
| Counter and vanity heights | Stand at the counter at true eye height | Kitchen counter 850–900 mm |
| Daylight and glare | Look towards windows at different times | West glare in the afternoon; check orientation |
| Overall proportion | Does the room feel crowded or empty? | Judged by eye, then confirmed on the plan |
The figures in the right-hand column are the commonly used practical values cited elsewhere on this blog, drawn from references such as Neufert's Architects' Data, Time-Saver Standards and NBC 2016. VR does not replace them; it makes them felt. A family that has read that a kitchen aisle should be 1200 mm for two cooks understands it immediately when they stand in a 1000 mm aisle in the headset and try to pass each other.
Setting up a comfortable review session
A VR review is a meeting, and it needs the same preparation as any important client meeting. The room should have a clear, flat floor area of at least about 2 × 2 metres for a standing session — commonly recommended by headset makers for room-scale use — with no furniture, steps or glass tables nearby. A large screen should mirror what the headset wearer sees, so the rest of the family and the designer can follow and discuss. A chair should always be available. The drawings, the material board and the change list should be on the table, because decisions made inside the headset need to be written down immediately.
Comfort deserves real attention. Some people experience motion sickness in VR, especially when the view moves smoothly while their body stays still. Teleporting between points instead of gliding, keeping a high and steady frame rate, limiting each stint in the headset to about fifteen or twenty minutes, and offering a seated mode all help. Elders, people prone to motion sickness, and anyone with health concerns should be offered the 360° panorama or the screen view instead, without pressure. Headset makers publish health and safety guidance, including age recommendations, and studios should follow it. A disposable or cleanable face cover for each user is a basic hygiene step.
Remote reviews for families abroad
Many Indian families have members living in other cities or abroad, and many projects — including international hospitality work — involve owners who cannot visit often. 360° panoramas shared as a web link can be viewed on any phone, and some standalone headsets can join a shared session in the same model from different locations. For international hotel and resort projects, this allows owners, operators and designers in different countries to stand in the same virtual room and agree on a lobby or a guest room before the mock-up is built.
What VR walkthroughs cost in 2026
For clients, the cost of a VR walkthrough is mostly the cost of building a good 3D model, which a design studio needs to do for renders anyway. Many studios include a set of rendered views and 360° panoramas in their design fee, and charge separately for full VR sessions, animated videos or extra design options. For studios, the main costs are hardware, software licences and the modelling time. The figures below are indicative October 2026 ranges in India, excluding GST; they vary considerably by brand, region and project size.
| Item | Indicative cost (Oct 2026) | Notes |
|---|---|---|
| Standalone VR headset | ₹35,000–70,000 | Portable; no PC needed; good enough for most interiors |
| PC for tethered VR and real-time rendering | ₹1,20,000–2,50,000 | Needs a strong graphics card; higher visual quality |
| Real-time rendering or VR software | Annual licence per user; varies by vendor | Some design tools include VR viewers |
| 360° panoramas, per view (as an add-on) | ₹1,500–5,000 per view | Often included in a design fee package |
| Animated walkthrough video | ₹15,000–60,000 per home | Depends on length, rooms and quality |
| Full VR session for a home (add-on) | ₹15,000–50,000 | Includes optimisation and one review session |
| Additional design option modelled | Varies with scope | Agree in the design fee before modelling starts |
Set against the cost of execution, these figures are small. In a mid-range 3BHK whose interior runs into many lakh rupees, a single avoided mistake — a wardrobe rebuilt because its shutters hit the bed, a false ceiling lowered and redone because a beam was missed, a kitchen island removed because the aisle was too tight — usually costs more than the entire walkthrough. The real saving, though, is time: decisions that might take weeks of back-and-forth over renders can be made in one session.
What VR cannot show
VR is excellent at space and poor at surface. Headset displays have their own colour characteristics and brightness limits, so a laminate shade or paint colour seen in VR is an approximation; a white wall may look grey and a warm wood may look orange. Textures can be seen but not touched, so the feel of a fabric, the grip of a matte tile or the coolness of stone must be judged from samples. Lighting in VR is a simulation, and while real-time engines are good, the exact brightness and colour of an LED strip in a real cove is better judged with a mock-up on site. And no model can show workmanship — the straightness of a joint, the evenness of a paint finish, the alignment of shutters.
| VR shows well | VR shows approximately | VR cannot show — use samples or site checks |
|---|---|---|
| Room scale and proportion | Colours of paints and laminates | Touch and texture of materials |
| Heights of ceilings, beams, counters | Natural daylight at different times | Exact LED brightness and colour in a real cove |
| Clearances, aisles, passages | Reflections on glossy finishes | Smell, acoustics and echo |
| Sight lines from doors and seats | Pattern scale of fabrics and tiles | Workmanship and finish quality |
| Layout options side by side | Night-time lighting mood | Site conditions behind walls and ceilings |
The practical rule is to use VR to decide layout and scale, and to use physical samples, a material board seen under the room's actual light, and small on-site mock-ups to decide finishes and lighting. Sign-off should still be on dimensioned drawings and a written specification, because those are what the carpenter, electrician and painter build from; the VR model is the shared understanding, the drawings are the contract.
Where design review is going
Three developments are changing design review quickly. Mixed-reality headsets and tablets can now overlay a design on the real room, so a client standing in their bare flat can see the proposed kitchen or wardrobe in place, at true scale, and walk around it. Laser scanning and photogrammetry can capture an existing site as a detailed 3D model, which makes renovation projects much more accurate than modelling from tape measurements. And software increasingly links the 3D model to the drawings and the bill of quantities, so a change made during a VR review updates the quantities and price as well. Further ahead, multi-user sessions where owners, designers and contractors meet inside the model are likely to become routine for larger commercial projects. What will not change is the need for good drawings, true dimensions and honest samples. A beautiful walkthrough of an inaccurate model is worse than none, because it creates confidence where none is due.
Rules for using VR walkthroughs well
- Model from a measured site survey, never from the builder's brochure plan.
- Set the virtual eye height to the client's own — about 1500–1650 mm standing, 1100–1200 mm seated.
- Test every model in the headset before the client session and fix floating, missing or mis-scaled objects.
- Bring a checklist of clearances and heights to the session, and spend the time on scale, not colour.
- Keep a clear area of at least about 2 × 2 m, mirror the view to a screen, and keep stints to 15–20 minutes.
- Offer panoramas or screen views to anyone uncomfortable in a headset, without pressure.
- Decide finishes from physical samples under the room's real light, not from the headset.
- Record every decision on a signed change list and update the drawings before execution.
Frequently asked questions
What is a VR walkthrough in interior design?
It is a true-scale 3D model of a proposed interior that the client explores wearing a virtual reality headset. They can look around, move through the rooms and see the design from their own eye height, which makes the size and feel of spaces much easier to understand than from drawings or still images.
Is a 3D walkthrough the same as VR?
Not always. A 3D walkthrough is often an animated video along a fixed path or an interactive model on a screen. VR means viewing the model through a headset at one-to-one scale, with head tracking, so the client feels present in the space. 360° panoramas sit in between: they can be viewed on a phone or in a headset, but only from fixed points.
How much does a VR walkthrough cost in India?
Indicatively, in October 2026, a full VR session for a home costs about ₹15,000–50,000 as an add-on, 360° panoramas about ₹1,500–5,000 per view, and animated walkthrough videos about ₹15,000–60,000, depending on size and quality. Many studios include panoramas or renders in their design fee; confirm what is included before starting.
Can I view a VR walkthrough on my phone?
Yes, in a limited form. 360° panoramas and web-based 3D viewers work on most phones; you can look around by moving the phone or dragging on the screen. For true scale and free movement, a VR headset gives a much stronger result.
Does VR replace drawings and samples?
No. VR is best for understanding space and making layout decisions. Colours, textures and lighting should still be chosen from physical samples and mock-ups, and the work is built from dimensioned drawings and a written specification, which remain the basis of the contract.
Sources & standards
- Ivan E. Sutherland, "A head-mounted three dimensional display", Proceedings of the AFIPS Fall Joint Computer Conference, 1968
- Ernst and Peter Neufert, Architects' Data — human dimensions, eye heights and space clearances
- Time-Saver Standards for Interior Design and Space Planning — clearances and circulation
- National Building Code of India 2016, Part 3 (Development Control Rules and General Building Requirements)
- Bureau of Indian Standards — IS 3646 (Part 1): Code of practice for interior illumination
- VR headset manufacturers' published health and safety guidance — play-area size, age recommendations and comfort
- Manufacturer standard ranges for real-time rendering and VR software, described generically
- Price ranges: indicative October 2026 estimates — confirm locally before budgeting