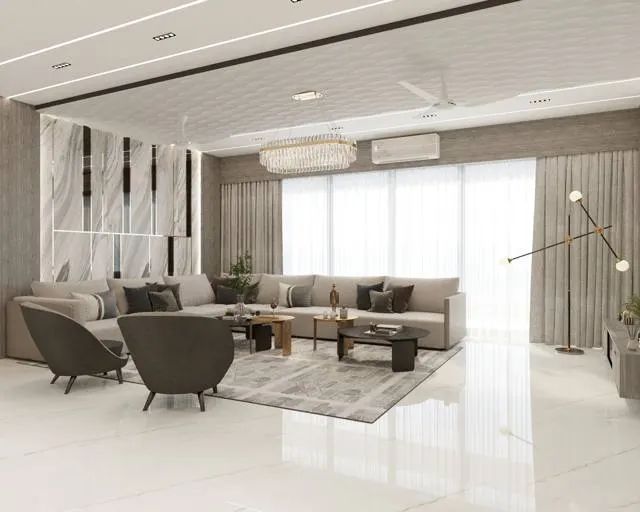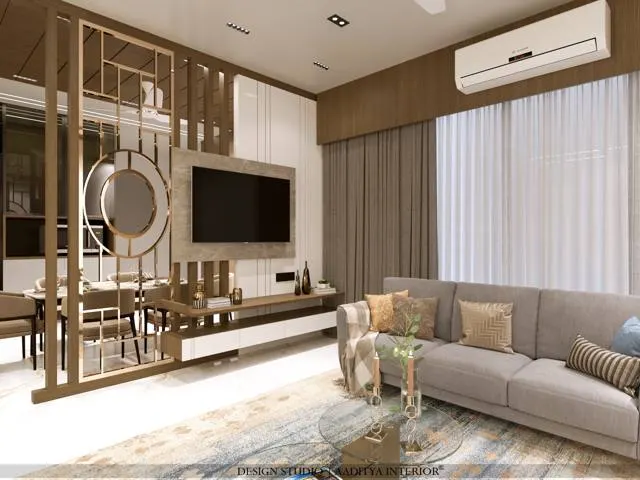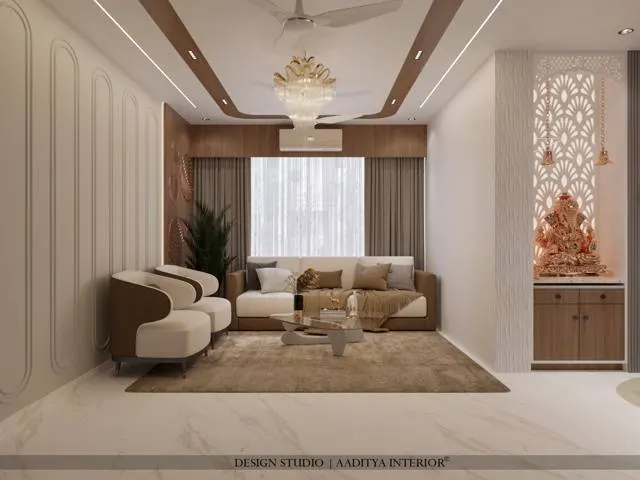

Walk into almost any interior-design meeting in India today and the laptop opens straight to a 3D render: a glowing living room, a marble-look kitchen, light falling just so. The render is beautiful, the client is sold, and the deal is often done on that image alone. Months later, on site, the questions begin — how high is that shelf, what is the wardrobe actually made of, where does the wire for that light run — and nobody has the answers, because the project bought a picture and never bought the drawings. The render showed what it would feel like; it never showed how it would be built.
This is the central confusion of modern Indian interiors: the 3D render and the 2D working drawing are not rivals and not substitutes. They are two different tools doing two different jobs. The render communicates the look to the client; the 2D drawing communicates the construction to the factory and the site. A project that has only renders is a project with no instructions; a project that has only 2D drawings is one the client never truly saw. Good practice produces both, in the right order, and the client's job is to know which is which and to insist on the one that actually gets built.
This article separates the two cleanly. It explains what a 2D drawing is and the standard set an interior project should include, what a 3D render and a walkthrough are and what they are honestly good for, where each helps and misleads, and how the two fit together through the project. The aim is that a homeowner or shop owner can look at a designer's deliverables and know whether they are holding a sales image or a buildable instruction — and ask for whatever is missing before money is committed.
A short history: from the drawing board to the render
Interior and architectural communication began entirely in 2D. For most of the twentieth century a project lived as hand-drawn plans, elevations and sections on paper, drawn to scale with a set square and a scale rule, and every tradesperson read the same lines. The drawing was the single source of truth. Perspective sketches existed to show clients the feel, but they were artistic impressions, slow to make and rarely exact. The discipline of the orthographic drawing — plan, elevation, section — is what made a building repeatable and checkable, and it remains the backbone of construction today.
Computer-aided drafting replaced the board but not the logic: the 2D drawing stayed the instruction, now faster to produce and edit. The real change came with affordable 3D modelling and rendering in the 2000s, which let designers build a virtual model and photograph it under virtual light. In India this arrived at the same moment as social media and easy image sharing, and the render quickly became the main sales tool because it is instantly understood by a client who cannot read a plan. The danger is that the render's persuasiveness has, in many projects, pushed the humble 2D drawing out of sight — even though the render is generated from a model that still has to become real 2D instructions before anything is cut.
What a 2D drawing is, and the set a project needs
A 2D drawing is a flat, scaled, dimensioned representation of one view of the work: looking down (a plan), looking at a wall straight on (an elevation), or looking through a cut (a section). Because it is to scale and carries real dimensions, a tradesperson can build directly from it. An interior project is not one drawing but a coordinated set, each sheet answering a different question. The set below is the practical minimum for a residential fit-out; a larger or commercial project adds more detail sheets, but the logic is the same — every surface, joint and service point eventually needs a drawing that tells someone exactly what to do.
| 2D drawing | Shows | Used by | Why it matters |
|---|---|---|---|
| Furniture layout plan | Where everything sits | Client, carpenter, mason | Fixes circulation and furniture positions |
| Flooring plan | Tile or floor pattern and starts | Tiler | Avoids awkward cut tiles at edges |
| False-ceiling plan | Ceiling design and lights | Ceiling contractor, electrician | Coordinates light points and coves |
| Electrical layout | Switches, points, circuits | Electrician | Every socket in the right place |
| Plumbing layout | Water and drain points | Plumber | Fittings land where fixtures are |
| Wall elevations | Each wall, to scale | Carpenter, client | Heights of shelves, TV, panelling |
| Joinery details | How a unit is built | Factory, carpenter | Board, thickness, hardware, joints |
The two sheets clients most often never see are the wall elevations and the joinery details, and they are the two that decide whether the home is actually buildable. An elevation fixes the height of a TV unit, a shelf, a wardrobe loft, a mirror — the numbers a render simply implies. A joinery detail fixes the material, the board thickness, the hardware and the way two panels meet. A project with a beautiful render but no elevations and no details is a project where every one of those numbers will be decided, under pressure, by whoever happens to be on site that day.
What a 3D render is, and what it is honestly for
A 3D render is a photograph of a virtual model. The designer builds the room in modelling software, applies materials and lights, and the computer calculates a realistic image. A walkthrough or 360-degree view is the same model turned into motion or an explorable panorama. The great strength of the render is that it is instantly understood: a client who cannot read a plan can look at a render and say yes, this is my home, or no, the sofa is too dark. It is the best tool ever invented for agreeing the look, the colour, the mood and the broad arrangement before any money is spent on construction.
But a render has honest limits that every client should know. It shows intent, not guarantee: materials in a render are idealised, light is perfect, and the real marble, laminate or paint will differ. It usually carries no dimensions, so it cannot be built from. And it can quietly hide problems — a render can show a wardrobe that no real hardware supports, a beam that was wished away, a socket that does not exist. The render is a promise about feeling, not a specification. Treated as the former it is invaluable; treated as the latter it is dangerous. The safeguard is simple: approve the render for look, then require that the 2D drawings match it and carry the numbers.
| Question | 2D working drawing | 3D render / walkthrough |
|---|---|---|
| Can it be built from? | Yes — scaled and dimensioned | No — shows intent only |
| Does the client understand it fast? | Often not without help | Yes — instantly |
| Shows exact sizes? | Yes, in millimetres | Rarely |
| Shows colour, light, mood? | Poorly | Very well |
| Used on site and in factory? | Yes, every day | Only for reference |
| Can it hide a real problem? | Harder — numbers expose it | Easier — it idealises |
Why a project needs both, and in what order
The two deliverables are a relay, not a contest. The honest sequence is: brief, then a 2D layout to settle the plan, then 3D renders to agree the look, then — once the look is frozen — the full set of dimensioned 2D working drawings and joinery details from which the home is actually built. The render comes in the middle, to win agreement on the feel; the detailed 2D comes at the end, to turn that agreed feel into instructions. When a studio delivers renders but no final working drawings, the project is being asked to build from a feeling, and the gaps are filled by guesswork on site.
For the client, the practical rule is to enjoy the render but pay attention to the drawings. The questions that protect a budget are about 2D: may I see the wall elevations, the electrical layout, the joinery details? Are the drawings dimensioned? Do they carry a scale and a title block with a revision number, so site and factory are building the current version? A designer who produces these as a matter of course is running a buildable project; one who offers only renders is selling an image and leaving the construction to chance.
Reading a drawing: scale, line and symbol
A client does not need to draft, but a little fluency in reading a drawing changes every site conversation. The first thing to find on any sheet is the scale, printed in the title block as a ratio such as 1:50 or 1:20. A scale of 1:50 means one unit on paper equals fifty in reality, so a plan at 1:50 shows the whole flat small, while an elevation at 1:20 or a joinery detail at 1:5 zooms in to show heights and construction. A drawing without a stated scale cannot be measured from reliably, which is why its absence is a warning that the sheet was made to look at, not to build from.
The second thing to read is the line and the symbol. A thick line is usually something cut through — a wall in plan, a panel in section; a thin line is a surface or an edge seen beyond. A dashed line is something hidden or above, such as a loft or a beam over. Standard symbols mark doors as a leaf and an arc of swing, windows as parallel lines in the wall, electrical points as small coded circles, and a door's swing direction tells a client whether it will clash with a switchboard or a wardrobe. None of this is difficult, and a few minutes spent asking the designer to walk through the symbols on the first sheet pays off through the whole project.
The third habit is to check that the drawings agree with each other and with the render. The furniture layout, the electrical plan and the elevations should tell one consistent story: a bedside table on the layout should have a socket beside it on the electrical plan and a height on the elevation. When the sheets disagree, the disagreement is cheaper to catch on paper than on site. A coordinated set is the real deliverable; a render and a single plan that contradict each other are a project waiting to go wrong.
| Scale | Typical use | One metre reads as | Shows |
|---|---|---|---|
| 1:100 | Whole-flat layout | 10 mm | Overall arrangement, circulation |
| 1:50 | Room plans, ceiling plans | 20 mm | Furniture positions, services |
| 1:20 | Wall elevations | 50 mm | Heights of units, shelves, TV |
| 1:10 | Large details | 100 mm | Joints, profiles, fixings |
| 1:5 | Joinery details | 200 mm | Board, thickness, hardware |
| 1:1 | Full-size profile | 1000 mm | A moulding or edge, actual size |
What each deliverable costs and takes
Deliverables are priced in two ways: bundled inside a design fee, or charged separately per drawing or per view. Treating them separately helps a client understand what they are paying for. The ranges below are indicative October 2026 figures for residential work and vary widely with city, studio and complexity, so they must be confirmed locally; many studios fold all of this into a per-square-foot or percentage design fee rather than itemising it. What matters is not the exact number but that the full 2D set is in the deal, not just the renders.
| Deliverable | Indicative cost | Typical time | Note |
|---|---|---|---|
| Full 2D working set (per room) | ₹3,000–12,000 | 2–5 days | Layout, ceiling, electrical, elevations, details |
| Single 3D render (per view) | ₹1,500–6,000 | 1–3 days | Photo-real still of one angle |
| 3D walkthrough / 360 view | ₹8,000–40,000 | 1–2 weeks | Motion or explorable panorama |
| Bundled design fee (per sq ft) | ₹30–150+ | Project length | Often includes 2D set plus key 3D views |
| Design as % of project cost | 5–12% | Project length | Covers design and, at the top, supervision |
Where the tools are going
The line between 2D and 3D is blurring at the model, not at the deliverable. Real-time rendering now lets a designer change a material or a light and show the result instantly, so the render becomes a live conversation rather than a finished picture emailed days later. Virtual-reality headsets let a client stand inside the unbuilt room at full size, which catches spatial mistakes a flat render hides — a passage that feels narrow, a loft that is too high to reach. Building-information models hold the whole project as data, so that a change made once updates the plan, the elevation and the quantities together.
None of this retires the 2D drawing; it strengthens it. All of these tools ultimately generate the same scaled, dimensioned instructions that a carpenter and an electrician need, because a factory still cuts a board to a number and a wire still runs to a point on a plan. The future client will approve the look in a headset and build from a drawing that the headset's model produced automatically. The lesson for today is unchanged: be delighted by the 3D, but pay for the 2D, because only the 2D gets built.
It is worth noticing why the render became so dominant in the first place: it closed a gap the 2D drawing never could, between what a designer imagined and what a non-technical client could picture. That was a real advance, and nothing here argues against it. The error is only in letting the tool that sells the look quietly replace the tool that builds the room. A mature project keeps both in their places — the render to agree and the drawing to construct — and treats the moment the look is frozen as the signal to invest properly in the dimensioned set. A studio that resists producing full working drawings, or that charges for renders but treats drawings as an afterthought, is a studio whose sites run on improvisation, and improvisation on an Indian interior site is paid for in rework, delay and the small daily compromises that add up to a home that is almost, but not quite, what was promised.
Frequently asked questions
Is a 3D render enough to start construction?
No. A render shows the intended look but carries no reliable dimensions, materials specification or service positions, so nothing can be built accurately from it alone. Construction needs the 2D working set — layouts, elevations and joinery details, to scale and dimensioned. Approve the render for the look, then build from the drawings that match it.
Why do designers show 3D first if 2D is what gets built?
Because a render is instantly understood and a plan is not. Showing the look first wins the client's agreement on mood, colour and arrangement quickly, which then lets the detailed 2D drawings be produced against a frozen design. The order is sound; the mistake is stopping at the render and never producing the final 2D set.
Which 2D drawings should I always ask for?
At minimum: the furniture layout, the false-ceiling and electrical plans, the plumbing layout, wall elevations for every furnished wall, and joinery details for custom units. These are the sheets that fix positions, heights, services and how each unit is made. Ask whether they are dimensioned and carry a scale and revision number.
Will the real room look exactly like the render?
Close, but not identical. Renders idealise materials and light, so real marble, laminate and paint will differ in tone, and daylight behaves differently from virtual light. Treat the render as a faithful guide to the design intent rather than a photograph of the finished room, and check real material samples against it before ordering.
Does paying for more renders improve the result?
Only up to a point. A few well-chosen views settle the look; beyond that, extra renders add polish, not buildability. The money that improves the real result is spent on complete, dimensioned 2D drawings and site supervision, which is what turns an approved look into a correctly built room.
Sources & standards
- Bureau of Indian Standards — IS 962 (code of practice for architectural and building drawings) and SP 46 on technical drawing conventions
- National Building Code of India 2016, Part 2 (Administration) and Part 3 — drawings and documentation for sanction and construction
- Ernst Neufert — Architects' Data, on orthographic projection, scales and dimensioning of interiors
- Time-Saver Standards for Interior Design and Space Planning — the standard drawing set and construction documents
- Council of Architecture (India) — scope of services describing concept, design development and working drawings as distinct stages
- Price ranges: indicative October 2026 estimates — confirm locally before budgeting