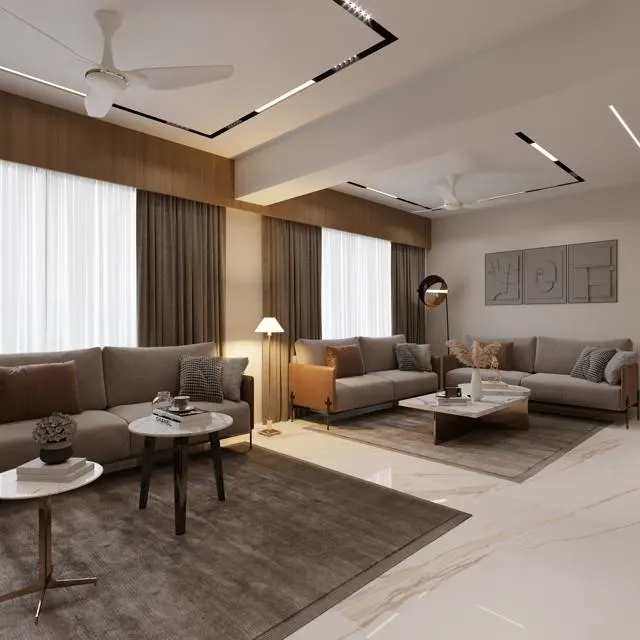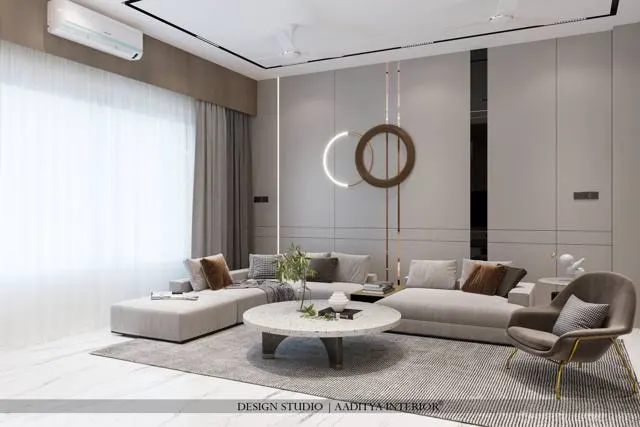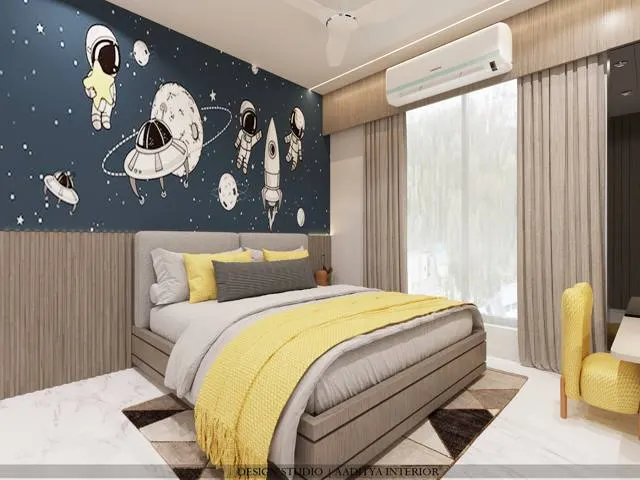

In most Indian interior projects the drawings get all the attention, but the materials decide how the home actually turns out. The plan can be perfect and the furniture well built, yet the flat still disappoints because a laminate was chosen under yellow showroom light, a board that hated water was fixed below a window, or three different whites were approved for one wall and none of them matched on site. Material selection is not a shopping trip taken near the end of the job. It is a process that runs from the first meeting to the final site visit, and when it is treated as one, the finished home looks considered, wears well and stays close to the budget that was agreed.
The common mistakes are predictable. A single sample is approved from a tiny chip instead of a full sheet, so the real grain or shade is a surprise. Finishes are picked one at a time, room by room, so the house reads as a collection of unrelated showrooms rather than one home. Exposure is ignored — a water-hungry board goes into a bathroom vanity, a soft matte paint goes on a high-touch passage wall — and the problem shows up in a year, not a week. And almost nothing is signed, so when a wrong shade arrives there is no record of what was agreed and the argument is unwinnable.
This article sets out how a disciplined studio runs material selection in India: the six stages and what each produces, how materials are matched to the exposure of each zone, how a sample or material board is built and signed off, how the finishes are budgeted in indicative October 2026 rupees, and where the whole practice is heading as digital libraries and sustainability pressures change it. It is written for homeowners who want to follow the process, and for students learning to run it.
Why selection is a process, not a shopping trip
A material has to satisfy four masters at once, and a showroom only shows one of them. It must look right — colour, grain, sheen and scale against everything near it. It must survive its exposure — water, heat, sunlight, fingers and cleaning. It must fit the budget, not just per square foot but multiplied across the whole house. And it must be available and deliverable in time, in the quantity needed, from one batch so the shade does not jump. A finish chosen for looks alone fails one of the other three tests often enough that the only safe method is to test all four, deliberately, before anything is ordered. That is what turns selection from shopping into a process.
The second reason is coherence. A home has perhaps forty or fifty material decisions — floors, walls, ceilings, shutters, counters, handles, skirting, grout, hardware finish — and they have to belong together. Deciding them one at a time, as each room is built, almost guarantees drift: the brass handle that looked warm in the bedroom fights the cold chrome tap chosen three weeks later in the bathroom. Selecting the whole palette up front, from one board, is the only way to keep a house looking like one hand designed it. Aaditya Interior treats the palette as a single document that every later decision is checked against.
How Indian practice arrived here
For most of the twentieth century, material choice in Indian homes was narrow and therefore simple. Floors were red oxide, Kota or mosaic; walls were lime or distemper; joinery was site-made in Burma teak or local hardwood and polished by hand. There was little to compare and almost nothing to specify, so selection happened on site, by the carpenter and the mason, with the owner approving a shade of polish at the end. The idea of a material palette drawn up in advance did not exist because the menu was short and familiar.
The liberalisation of the 1990s and the building boom that followed changed everything. Engineered boards, hundreds of laminates, vitrified tiles, modular hardware, quartz, acrylics, PU finishes and imported stone arrived together, and the number of possible combinations exploded. With choice came the risk of choosing badly, and the professional response was the material board and the specification sheet — borrowed from architectural practice and from global studios — which brought order to the new abundance. Today a competent Indian interior studio runs selection as a documented process precisely because the market is too large to improvise in.
The six-stage selection process
The process below is the backbone of a well-run fit-out. Each stage has one main output, and no stage should begin before the one before it is signed. The timings are indicative for a three-bedroom home and compress or stretch with size and decision speed; the discipline, not the exact day count, is what matters.
| Stage | What happens | Main deliverable | Typical time |
|---|---|---|---|
| 1 · Brief | Needs, lifestyle, maintenance appetite and budget are recorded per room | Written material brief | 2–3 days |
| 2 · Palette | Concept shades and a material direction are proposed for the whole home | Concept palette / mood board | 4–7 days |
| 3 · Sampling | Full-size samples are gathered for every finish and seen in real light | Physical sample set | 7–14 days |
| 4 · Sign-off | Client approves each sample; shades, codes and locations are fixed | Signed material board | 2–3 days |
| 5 · Procurement | Quantities are calculated and ordered, ideally from one batch | Purchase orders, batch record | 7–21 days |
| 6 · Site QC | Delivered material is checked against the signed board before fixing | Inspection record | Ongoing |
Matching material to exposure: the zone map
The single most useful habit in material selection is to look at a home not as rooms but as exposure zones, and to choose for the exposure first and the look second. A wet zone — the splash area of a kitchen, a bathroom, a utility, the base of an entrance — needs a material that shrugs off water: BWP marine plywood to IS 710 for carcasses, WPC or metal for anything near constant moisture, vitrified or stone underfoot, and a washable paint on the walls. A high-touch zone — passage walls, handles, switch surrounds, children's rooms — needs a hard, cleanable finish that forgives fingers. A high-heat zone — behind the hob, around the chimney — needs a non-combustible surface. A dry decorative zone — a feature wall, a ceiling, a wardrobe shutter in a bedroom — can take the softer, prettier, cheaper materials that would fail anywhere wet.
| Zone / exposure | Recommended | Acceptable | Avoid |
|---|---|---|---|
| Bathroom vanity, utility carcass | BWP marine ply (IS 710), WPC | Compact laminate on frame | MDF, particle board, raw HDHMR |
| Kitchen carcass (dry part) | BWR ply (IS 303) | HDHMR | Particle board for long-life work |
| Behind the hob / chimney | Vitrified tile, quartz, stainless | Toughened glass | Laminate, acrylic, timber |
| Passage and high-touch walls | Hard emulsion, laminate panels | PU-finished panelling | Soft distemper, delicate texture |
| Shutters in dry rooms | HDHMR with laminate or PU | MDF with laminate | Bare MDF in any damp room |
| Flooring, wet areas | Anti-skid vitrified, stone | Full-body porcelain | Polished marble where it stays wet |
| Feature walls, ceilings | MDF, veneer, texture paint | WPC louvres | Water-sensitive boards near windows |
Building and reading the sample board
A sample board is the project's single source of truth for material. It is a physical sheet — or a set of them — carrying a labelled, full-size sample of every finish, grouped the way the home is: one board per room or per palette. Full size matters because colour and grain change with scale and light; a 50 mm chip under a showroom's warm lamp lies, while an A4 or larger piece seen in the actual room at the actual time of day tells the truth. Every sample is tagged with its name, brand, shade code, finish and the exact location it will go, so there is no ambiguity when it is ordered or when it arrives. The board is photographed, and the photograph is dated.
Reading the board well means checking the finishes against each other, not one by one. The floor, the wall and the shutter are laid side by side to see whether they argue. Metals are grouped so that the home commits to one family — warm brass or cool chrome — rather than a muddle of both. Whites are compared against whites, because a warm white ceiling over a cool white wall looks like a mistake even though each looked fine alone. Only when the whole board sits together comfortably, in daylight and again under the evening lighting the room will actually use, is it ready to sign.
Specification and sign-off
Approval is worthless unless it is recorded, so the sign-off stage converts the board into a specification: a written schedule that names, for every surface in the home, the exact material, brand, code, finish, size and quantity. This is the document the contractor buys from and the document a wrong delivery is measured against. Without it, selection collapses back into memory and argument; with it, a mismatched batch is the supplier's problem, not the client's loss. The sample board and the specification schedule are signed together, and both are dated, because the day of approval settles which version of a brand's ever-changing catalogue was agreed.
| Check at sign-off | Why it matters | Who signs |
|---|---|---|
| Full-size sample, not a chip | Shade and grain change with scale | Client and designer |
| Seen in the room's own light | Showroom light flatters and misleads | Client |
| Shade code recorded | Lets the exact batch be reordered | Designer |
| Location written on the tag | Stops a material going to the wrong wall | Designer |
| Metals one family | Mixed brass and chrome looks unplanned | Client and designer |
| Signed and dated | Fixes which catalogue version was agreed | Client |
Budgeting the finishes
Material selection and money are inseparable, because the same design can swing by lakhs depending on the finish chosen. The way to keep control is to price every finish per unit, then multiply by the real quantity before approving it — a premium that is trivial on one shutter becomes painful across thirty. The bands below are indicative October 2026 ranges, material plus application where relevant, excluding GST, and should be confirmed with local suppliers; they are consistent with the finish prices used across this blog. They are enough to budget a palette and to see where a saving or a splurge actually lands.
| Finish item | Indicative Oct 2026 (₹) | Unit | Notes |
|---|---|---|---|
| Laminate shutter finishing | ₹350 – ₹650 | per sq ft | Best value; sheet alone ₹42–56 per sq ft |
| Membrane / foil shutter | ₹500 – ₹850 | per sq ft | Budget route to routed and curved designs |
| Acrylic shutter | ₹900 – ₹1,500 | per sq ft | Mirror gloss; shows every mark |
| PU paint shutter | ₹1,000 – ₹1,800 | per sq ft | Seamless premium colour; slow to apply |
| Natural veneer shutter | ₹600 – ₹1,100 | per sq ft | Veneer plus polish; book-matching extra |
| Quartz counter | ₹250 – ₹600 | per sq ft | Value to designer bands; premium higher |
| Premium emulsion wall | ₹20 – ₹30 | per sq ft | Washable; the value default for walls |
| Vitrified flooring | ₹85 – ₹160+ | per sq ft | Material plus laying; anti-skid for wet areas |
Where material selection is going
Three shifts are changing how studios select. The first is the digital library: curated material databases and sample-ordering platforms let a designer assemble a palette on screen and have full-size samples couriered, which speeds the early stages without removing the physical check that still has to happen in the room. The second is data: as more Indian projects are modelled in BIM, materials arrive carrying their own information — fire rating, emissions, maintenance, cost — so selection starts to balance performance against looks with numbers attached rather than by feel. The third is sustainability. Low-emission boards, recycled and rapidly renewable surfaces, and honest provenance are moving from a luxury ask to a routine one, and certifications under green rating systems increasingly reward them. None of this removes the sample board; it makes the early filtering faster and the final choice better informed.
Procurement and checking on site
Once the board is signed, the finishes have to be bought and delivered without the shade drifting, and this is where a disciplined studio protects the earlier work. Quantities are calculated from the drawings with a sensible allowance — commonly 5 to 10 per cent extra for cuts, wastage and a reserve for future repair — because running short mid-job forces a reorder from a different batch, and a fresh batch of laminate, tile or stone rarely matches the first exactly. Each finish is ordered, as far as possible, from a single batch or dye lot, and the batch number is recorded against the specification. Lead times are checked early: an imported stone or a made-to-order shutter finish can take weeks, and a late discovery forces a substitution that undoes the agreed palette.
Checking on site is the stage most often skipped and most expensive to skip. Every delivery is inspected against the signed board before it is fixed, not after: the laminate against its sample, the tile against its shade card, the paint against its code. A material that does not match, or that has arrived damaged, is rejected and re-ordered, and is never quietly swapped for whatever is in the van that day — the single commonest way a careful selection is wrecked on site. The reserve samples kept from sign-off are the reference for every such check, which is why they are stored, labelled, until the project hands over.
Finally, the record outlives the project. The signed board, the specification schedule with brands and shade codes, and the batch numbers become a maintenance document: when a shutter is damaged two years later, or a wall needs repainting, the exact finish can be matched instead of guessed. Aaditya Interior hands this record to the client at completion, because a home is easier to live in and to repair when the materials in it are written down, not remembered.
Ten rules for selecting interior materials
- Start from a written brief per room — exposure, maintenance appetite and budget — before opening a single catalogue.
- Select the whole palette together from one board, not finish by finish as each room is built.
- Choose for exposure first and looks second: wet, high-touch, high-heat and dry zones each have their own shortlist.
- Insist on full-size samples (A4 or larger); never approve a floor, laminate or stone from a small chip.
- See every sample in the actual room, in daylight and again under the evening lighting the room will use.
- Commit metals to one family — warm or cool — and compare whites against whites, not against memory.
- Record brand, shade code, finish and exact location on every sample tag, and photograph the signed board.
- Convert the board into a written specification schedule with quantities, and sign and date both together.
- Order each finish from a single batch, and calculate 5–10 per cent extra for cuts, wastage and future repair.
- Check every delivery against the signed board before it is fixed; re-sample a wrong or out-of-stock material, never swap it quietly on site.
Frequently asked questions
When should material selection start in an interior project?
At the design stage, not at execution. The palette should be chosen and signed before carpentry begins, because the drawings, the carpenter's cutting and the electrical layout all depend on which materials and finishes were approved. Leaving it to site is what produces mismatches and delays.
How many laminate or paint samples should be compared?
Enough to settle the choice confidently, which usually means a small shortlist of three to five full-size samples per decision, seen together in the room. More than that tends to confuse rather than clarify. The key is comparing them side by side and against the neighbouring finishes, not judging each one alone.
Who chooses the materials — the client or the designer?
Both, with clear roles. The designer proposes a coherent palette that meets the brief, the exposure and the budget; the client approves, adjusts within those limits, and signs. The designer's job is to keep the choices working together and performing; the client's job is to live with the result, so the sign-off is theirs.
Is a digital or physical material board better?
A digital board is excellent for exploring and narrowing options quickly, but the final decision needs physical, full-size samples seen in real light, because screens misrepresent colour, sheen and texture. The best practice is hybrid: shortlist digitally, then approve physically in the room.
Sources & standards
- Bureau of Indian Standards — IS 710 (marine/BWP plywood), IS 303 (BWR plywood), IS 2046 (decorative laminates), IS 12406 (MDF)
- National Building Code of India 2016, Part 6 (Structural Design) and Part 8 (Building Services) — materials, finishes and fire aspects
- Indian Green Building Council (IGBC) and GRIHA — credits for low-emission materials and responsible sourcing
- Neufert, Architects' Data — fundamentals of material specification and finishes scheduling
- Time-Saver Standards for Interior Design and Space Planning — material selection and documentation method
- Price ranges: indicative October 2026 estimates — confirm locally before budgeting